Category: Vocals

  • Beginner Music Producer’s Guide: Crafting a Professional Sound from Your Bedroom Studio

    Beginner Music Producer’s Guide: Crafting a Professional Sound from Your Bedroom Studio

    Beginner Music Producer’s Guide: Crafting a Professional Sound from Your Bedroom Studio

    Introduction: The Bedroom Studio Revolution

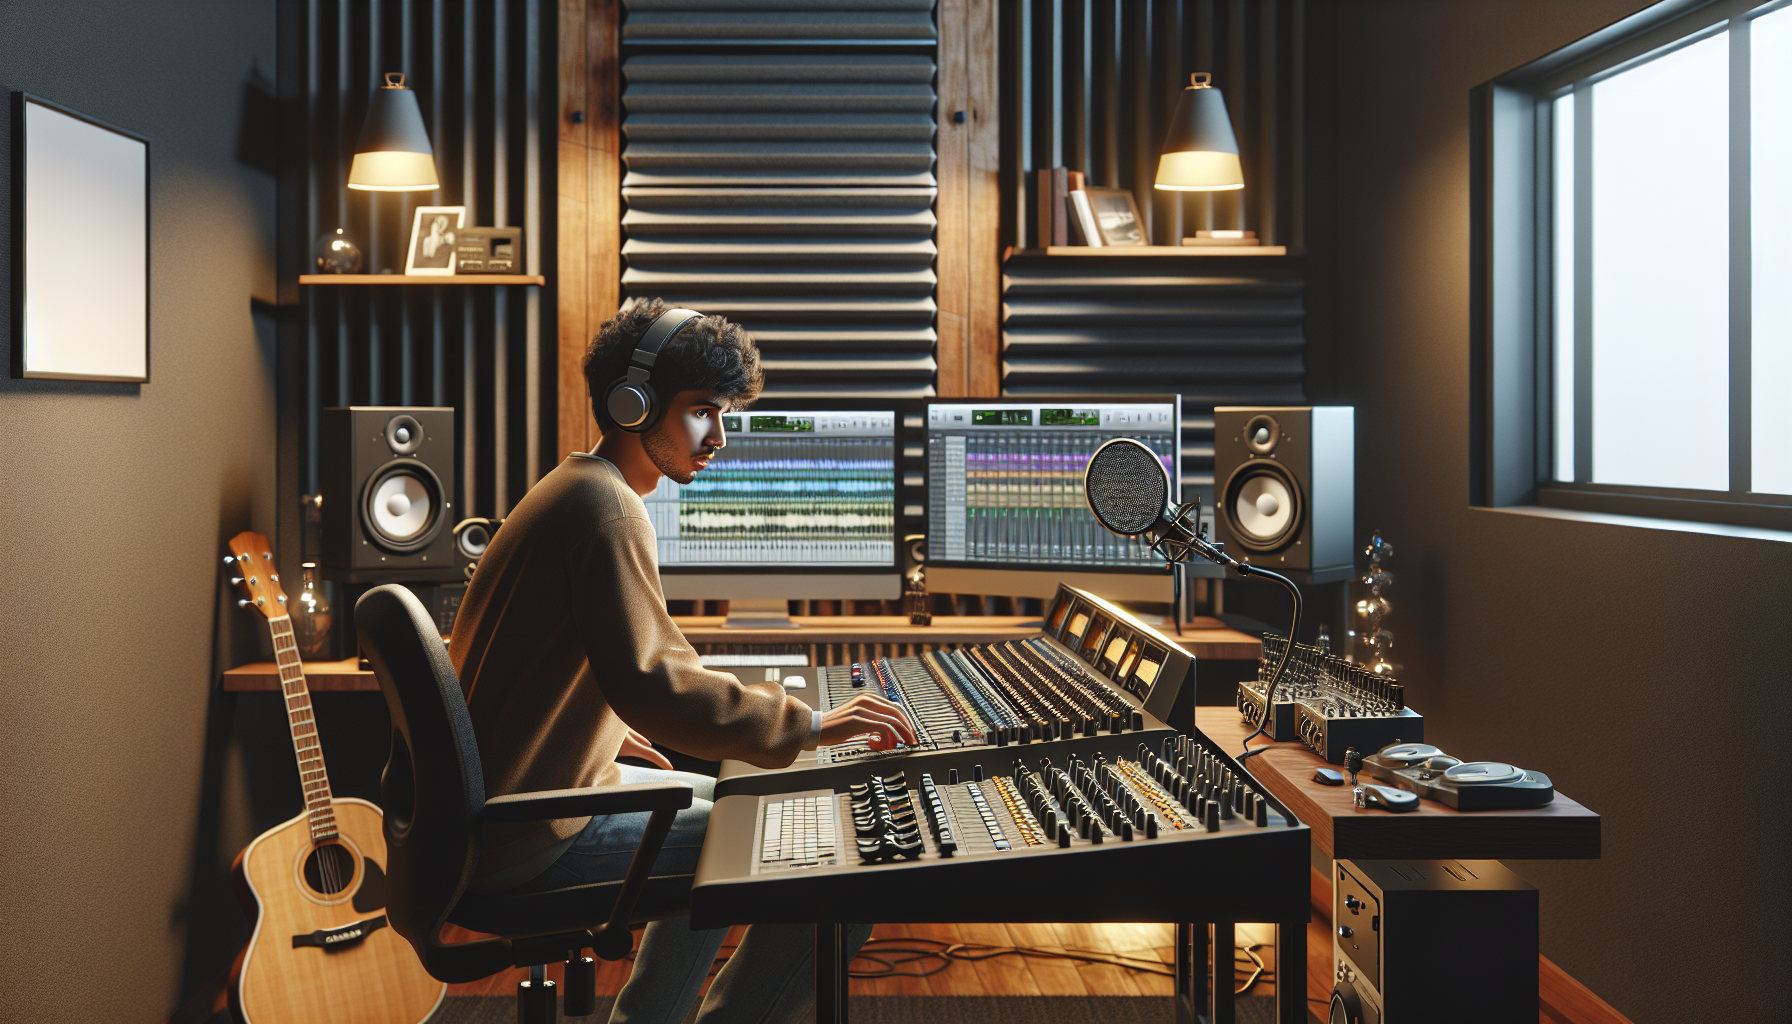
    The rise of bedroom studios has transformed music production, making professional-quality sound accessible to anyone with passion and the right tools. Gone are the days when creating radio-ready tracks required a multi-million-dollar studio. Artists like Billie Eilish and Finneas, alongside countless electronic and hip-hop innovators, have produced some of the most successful music of the past decade from the confines of home recording studios. Yet, starting out can be daunting—tight budgets, cramped spaces, confusing gear choices, and limited guidance can make it feel overwhelming.

    The good news: achieving a professional sound from your bedroom is within your grasp. In today’s music landscape, a “professional sound” means clean, balanced mixes that sound great on any speaker, without a hefty investment. This guide covers essential home studio setup, gear selection, cost-effective acoustic treatment, DAW workflow, and practical mixing strategies designed to help beginners like you maximize your space and create tracks that stand out.

    Step 1: Setting Up Your Bedroom Studio for Success

    Begin your home studio setup with essential gear: a laptop or desktop, a beginner-friendly DAW, a reliable audio interface, and either quality headphones or budget-friendly studio monitor speakers. Focus on items that will have the most significant impact on your workflow. Consider popular audio interfaces like the Focusrite Scarlett Solo or the Audient EVO series, which offer excellent performance at a reasonable price. For clarity in audio production, headphones like the Audio-Technica ATH-M40x are highly recommended.

    It’s crucial to choose the right spot for your home studio. Find a quiet area, away from noisy roads, windows, and high-traffic areas. Position your desk and monitors away from room corners and reflective surfaces to minimize acoustic issues.

    Don’t be deterred by myths about expensive gear. Great music has often been created on simple setups. Prioritize a streamlined, logical, and distraction-free workflow over fancy hardware.

    Pro Tip:
    Start with the “minimum viable setup”: computer, DAW, headphones, and audio interface. You can achieve remarkable progress before adding more equipment.

    Step 2: Affordable Acoustic Treatment & Sound Isolation Tips

    Room acoustics have a significant impact on your mixes. Untreated walls can distort sound, complicating level and balance assessments. While professional studios use costly foam and bass traps, budget-friendly acoustic treatment can be effective. Consider using bookcases filled with books for natural diffusion, hanging heavy curtains to absorb echoes, and placing your desk so that speakers face the long wall.

    For DIY panels, cover mineral wool or dense foam with fabric and place them behind your listening position or at key reflection points around your desk. Begin with basic absorption around your speakers and add more as necessary.

    Soundproofing basics—like door sweeps and rolled towels under doors—can help reduce noise disturbances.

    Pro Tip:
    Clap in your room and listen for echo or “ringing.” To improve clarity, hang a heavy blanket or reposition furniture as needed.

    Step 3: Choosing the Right Software & Workflow Tools

    Selecting a DAW is crucial. Leading beginner DAWs like FL Studio, Ableton Live Lite, and GarageBand come with powerful features and trial versions. Choose a DAW that’s compatible with your computer, fits your budget, and matches your workflow. FL Studio is popular among beatmakers, while Ableton suits electronic producers who use loops and live performances. Start with free or entry-level versions before upgrading.

    Enhance your sound with free or affordable VST plugins like Spitfire Audio LABS, Valhalla Supermassive, or Vital synth. These provide professional-grade effects and sounds without high costs.

    Set up DAW templates for regular session types, organize projects with a folder system, and use reference tracks for guidance by A/B comparing your mix with professional tracks.

    Accelerate learning via online communities, YouTube tutorials, and support forums for beginner producers.

    Pro Tip:
    Create a default project template in your DAW with your favorite sounds and setup to save time and start creating instantly.

    Step 4: Critical Listening, Mixing, and Audio Quality Hacks

    Critical listening is key to professional-sounding tracks. Sharpen your ears by referencing commercial tracks and switching between headphones, monitors, and smartphone speakers.

    If your room has acoustic problems, mix at lower volumes with headphones and periodically check mixes in mono using your DAW’s built-in tools. Practice effective gain staging to maintain headroom for mastering and avoid clipping.

    Ensure mixes translate well by testing them on various devices, like car speakers or earbuds. Use free plugins like iZotope Ozone Imager (stereo width) or Youlean Loudness Meter (level monitoring) to detect issues pre-export.

    Always export your final track in 24-bit WAV format with a sample rate of at least 44.1kHz to meet industry standards.

    Pro Tip:
    Take 15-minute breaks during mixing to return with fresh ears, improving your ability to detect issues.

    Step 5: Inspiration, Productivity, and Staying Consistent

    Talent blossoms through consistency and inspiration. Set small, achievable production goals—finish a demo or learn a new effect each week. Focus on progress over perfection, and incorporate “music-only” sessions to inspire creativity.

    Employ a session schedule: allocate time for writing, mixing, and research while preventing ear fatigue with breaks. Allow your studio setup to evolve with your growing skills, upgrading gear as necessary.

    Engage with online communities for feedback and collaboration. Realize that every professional track began as a rough demo, and confidently share your work; others are eager to support you.

    Pro Tip:
    Maintain a production journal to track ideas and progress, motivating creativity and consistency.

    Conclusion & Call to Action: Your Path to Professional Sound Starts Now

    In summary: focus on an efficient home studio setup, utilize cost-effective acoustic treatment, select the right DAW and tools for your workflow, and develop your critical listening skills. Stay inspired and consistent. Creating radio-ready tracks is about approach, not extravagance.

    Share your progress and experiences with fellow beginners, post online, and seek feedback. You don’t need a luxury studio; every successful track started with one song, and yours could be next.

    Are you ready to move forward? Download our complimentary “Bedroom Producer’s Essentials Checklist”, subscribe to our beginner production tips email series, or leave a comment. Seeking guidance? Contact our team for affordable coaching or studio sessions to elevate your music production journey.

    Others have succeeded from their bedrooms, and you can too—your professional sound begins today!

  • 10 Essential Studio Recording Tips for Singers to Nail Every Take

    10 Essential Studio Recording Tips for Singers to Nail Every Take

    “`html

    10 Essential Studio Recording Tips for Singers to Nail Every Take

    Recording vocals in a professional music studio is both thrilling and challenging. Whether you’re a seasoned vocalist or stepping into the booth for the first time, mastering these essential studio recording tips can transform your sound, feel, and performance. From preparing your voice to collaborating with engineers, the following expert insights will help you deliver flawless takes and build strong studio vocal performances—every time.

    Understanding the Studio Environment

    Stepping into a recording studio is a major change from singing live. The rooms, acoustics, and equipment can feel unfamiliar. Understanding the setup—from microphone types and placement to vocal booths and monitoring systems—helps you navigate this space confidently. In a recording studio, every detail is captured with clarity, including imperfections. Reducing nerves starts with familiarizing yourself with the session plan, communicating any questions, and knowing who’s in the room. The more you understand the environment, the more you can focus on your artistry rather than logistics.

    Pro Tip: Before your session, ask for a brief studio tour and a rundown of the schedule. This grounds you and ensures you won’t be caught off guard by technical procedures or studio etiquette.

    Pre-Session Preparation for Singers

    Peak vocal performance in the studio starts days before you step up to the mic. Rest and hydration are crucial. Establish a vocal warm-up routine focusing on gentle scales, humming, and breath work. Always bring printed lyrics, marked-up sheet music, or reference tracks for last-minute changes. Mental prep is key: use visualization techniques or calming breathing exercises to ease nerves. Dress comfortably to focus on singing, not attire. Finally, bring water or throat lozenges to stay at your best throughout the session.

    Pro Tip: Spend ten minutes meditating or using visualization exercises before entering the studio. Imagine nailing each take—this mental rehearsal can dramatically boost your confidence and clarity.

    Getting the Most from the Studio Headphones Mix

    Your studio headphones mix—what you hear in your ears—directly affects pitch, timing, and comfort. Communicate with the engineer to balance vocals and instrumentals until you’re comfortable. Many singers prefer one ear on and one off, while others focus with both ears covered. Don’t hesitate to request adjustments mid-session—a too-loud backing track or buried vocals can ruin performances. Staying synchronized with the music is essential for dynamic vocals.

    Pro Tip: Experiment with both single-ear and double-ear monitoring before recording. For intricate harmonies or timing-intensive songs, double-ear monitoring might help you stay aligned with the track.

    Mastering Microphone Technique

    Your microphone technique influences vocal tone, clarity, and dynamics. Maintain a consistent distance—typically 5–8 inches—for an even sound, moving closer for intimacy or farther back during powerful passages. Use a pop filter to minimize plosive sounds and sibilance. Consider the song genre; softer ballads might require close, gentle singing, while energetic tracks may require you to “ride” the mic. Be aware of your breath, as small noises are amplified in studio settings.

    Pro Tip: Rehearse with your home setup and record yourself singing at different mic angles and distances. This helps you understand how posture, position, and energy affect your sound, giving you more control in the studio.

    Delivering Emotion and Energy in the Studio

    Studio recordings can feel clinical, but the best takes convey emotion. Channel a live show’s intensity by focusing on the song’s story and letting emotions guide your phrasing. If nerves arise, close your eyes or move gently as you sing—just as you might onstage. Use subtle gestures or facial movements to tap into feelings. Some singers “act” the part, imagining they’re playing a character to access authentic emotions for the take.

    Pro Tip: Print your lyrics and underline key emotional phrases. Before each take, say the lines out loud, grounding the words in meaning for more compelling performances.

    Tackling Multiple Takes and Comping

    Recording rarely means getting it right in one go. Multiple takes let you experiment and relax, knowing mistakes are normal. To stay fresh, pace yourself—drink water, take breaks, and stretch. If you feel vocal fatigue, ask the engineer for a rest. After recording, the engineer will often “comp” your best phrases from various takes, creating the perfect vocal track. Your input here is crucial; offer feedback and listen back with focus.

    Pro Tip: If losing steam after many takes, stand up, shake out your body, and do five minutes of gentle vocal exercises. This resets your energy and brings your best self back to the mic.

    Studio Etiquette for Singers

    Professionalism can transform a good session into a great one. Arrive early, fully prepared, and with a positive attitude. Respect the studio’s schedule—sessions are often tightly booked. Communicate clearly with engineers and producers, and accept constructive criticism gracefully. If things get tense, stay calm and focus on solutions. Collaborate, don’t confront, to ensure productive sessions.

    Pro Tip: Bring a small notepad to jot down feedback and notes between takes. It demonstrates investment and keeps alignment with everyone in the room.

    Collaborating Effectively with Sound Engineers

    Your sound engineer is your partner in capturing your best performance. Build rapport by introducing yourself and discussing your vocal goals. Listen to their technical feedback—they might suggest adjustments to enhance your sound. Discuss monitor levels, effects, and vocal arrangement ideas openly. Always ask to listen back to takes together, evaluating results objectively. Remember, sound engineers can offer invaluable guidance.

    Pro Tip: Share a playlist of reference tracks with your engineer before your session. This helps them understand the vocal sound and style you’re aiming for, streamlining setup and mixing.

    Common Pitfalls and How to Avoid Them

    Even seasoned vocalists face challenges. Over-singing due to nerves can lead to strain or unnatural performances. Align your style with the song—the wrong technique can feel out of place. Don’t push through vocal fatigue; rest and rehydrate. Address discomforts in the vocal booth—like temperature or lighting—that can affect focus. Double-check you have all critical materials—lyrics, water, headphones—before you leave for the session.

    Pro Tip: Develop a quick pre-session checklist and review it before every session. This habit minimizes last-minute stress and keeps you in control from the outset.

    Building Confidence and Developing Your Own Studio Style

    Every recording studio visit is a chance to grow as a vocalist. After each session, seek feedback from producers, engineers, or trusted peers about your strengths and areas for growth. Practicing at home with recording equipment sharpens your skills and boosts confidence for the real deal. Over time, establish rituals—favorite warm-ups, routines, or mindset exercises—that help you perform consistently. Set small, achievable goals for each session and celebrate progress. With persistence, your confidence and unique studio sound will blossom.

    Pro Tip: Start a “studio journal”—after every session, jot down what worked, what didn’t, and new ideas to try next time. This reflection accelerates your development and builds a record of your evolution.

    Conclusion and Call To Action

    Mastering these studio recording tips for singers involves more than perfecting pitch—it’s about preparation, communication, mindset, and growth. By understanding the studio environment, refining your pre-session rituals, mastering the microphone, and collaborating effectively, you’ll deliver emotionally resonant takes every time. Try these vocal recording tips in your next session to watch your confidence and results soar.

    Share your own studio stories or best practices in the comments below—we’d love to hear how you make studio magic happen!

    For more professional vocal recording advice, download our free session checklist or sign up for our insider newsletter, filled with resources for singers. Ready to elevate your studio vocal performance? Get in touch to book a session with our experienced team or explore more guides to record vocals in a studio like a pro.

    “`

  • How to Make Your DJ Mixes Stand Out on Social Media

    How to Make Your DJ Mixes Stand Out on Social Media

    How to Make Your DJ Mixes Stand Out on Social Media

    Introduction: Why Standing Out Matters for DJs on Social Media

    In today’s crowded digital landscape, learning how to make your DJ mixes stand out on social media is no longer optional—it’s vital. DJs face fierce competition for attention as platforms like Instagram, TikTok, and Soundcloud are filled with new sets, mixtapes, and blend videos daily. Yet, this challenge brings opportunity: social media is now the main stage for DJs aiming to find new listeners, book gigs, and establish powerful personal brands. The right promotion strategy can help you cut through the noise, build loyal followings, and turn casual listeners into dedicated fans or paying clients. With oversaturation, rapidly shrinking attention spans, and changing algorithms, many talented DJs struggle to grow their audience online. This guide breaks down actionable tactics for DJ social media promotion—from creative branding and eye-catching visuals to platform-specific techniques and real audience engagement. Whether you want to promote DJ mixes on Instagram or make your work go viral on TikTok, these strategies will help your sound get noticed and remembered.

    Crafting a Compelling Brand Identity for Your DJ Mixes

    Successful DJs have unique, memorable brands. Start with identifying your signature sound, curating a distinctive style, and building a recognizable visual identity—think logos, DJ mix cover art, and social media bios. Consistency is key: when your visuals, tone, and messaging align across all mix-sharing platforms, fans are more likely to remember and share your sets. Adapt your branding for each channel: bold, punchy images for Instagram, and fun, concise bios with emojis for TikTok. Use free or affordable design tools like Canva for logos and cover art. Ensure your DJ name and social media handles are consistent and easy to find across platforms like Instagram and Soundcloud.

    Pro Tip:
    Create a branding reference sheet to lock in your color palette, fonts, logo placement, and language style. This ensures instant recognition and helps your mixes stand out as a DJ online.

    Creating Visually Engaging Content: Standout Audio Visualizers and More

    In a fast-scrolling feed, mixes paired with strong visuals consistently earn more likes, shares, and saves. Tools like After Effects, Renderforest, and Kapwing allow you to easily add movement and music-reactive visuals to your DJ sets—perfect for Instagram Reels or TikTok DJ marketing. Simple waveforms, pulsing EQ spectrums, or animated cover art can make your posts more shareable. Integrate branding elements like your logo, consistent colors, and your DJ handle on video overlays. Supplement your posts with gig highlights, crowd shots, tracklists, or behind-the-scenes content. More visually original and branded content increases the likelihood users will pause and share.

    Pro Tip:
    Batch-produce a month’s worth of branded visualizer clips. Cycle them through your Instagram Reels and TikTok posts to boost brand recall and promote DJ mixes on Instagram.

    Optimising Your Mix Posts for Each Social Platform

    Each social channel has its own algorithm and best practices. On Instagram, use Reels for vertical, 15-30 second highlight clips—these attract new followers. Use Stories for mix teasers, gig announcements, or Q&As. TikTok thrives on short, attention-grabbing clips like creative transitions or “duet this mix” trends. For Soundcloud and YouTube, go longer (30-60+ minute full mixes) and optimize with descriptive, keyword-rich titles and tracklists. Pair every post with well-researched hashtags, clear captions, and timely scheduling to maximize reach.

    Pro Tip:
    Experiment with uploading at different times and track post-performance using Instagram Insights or TikTok analytics to pinpoint optimal times for maximum reach.

    Content Planning and Audience Engagement: Building a Loyal Following

    Consistency and community differentiate between a passive audience and a loyal fanbase. Plan a simple content calendar mixing snippets, visuals, behind-the-scenes reels, live streams, and crowd interaction. Encourage participation with remix contests and user-generated content. Collaborate with fellow DJs or influencers for cross-promotional content. Regularly review analytics—see which content formats drive interaction, then double down on what works. Don’t shy away from constructive criticism; it can sharpen both your mixing skills and your online impact.

    Pro Tip:
    Use Instagram’s “Poll” and “Question” stickers in Stories to engage fans. Engagement increases when followers feel included in your creative process.

    Turning Listeners into Fans and Clients: Converting Engagement into Growth

    Convert casual listeners into superfans or clients. Offer value with exclusive content through email lists, Patreon, or private communities. Include a clear call-to-action (CTA)—stream the full mix, share the post, follow your channel, or book you for gigs. Incentivize engagement with giveaways or “feature a fan” shoutouts. Link your Electronic Press Kit, gig dates, or booking info in bios and stories. Successful DJs use thoughtful cross-platform strategies for paid opportunities and loyal communities.

    Pro Tip:
    Set up a landing page or Linktree in your Instagram/TikTok bio, capturing every opportunity to turn curiosity into real business or long-term support from your growing audience.

    Your Next Moves for DJ Social Media Success

    Mastering DJ social media promotion goes beyond dropping mixes online—it’s about blending branding, creative content, and authentic engagement into a unique formula. Refine your brand identity, use captivating visuals, and optimize strategies for each platform. Consistency and community turn quick listens into dedicated fans, while strategic calls to action lead to gigs and collaborations.

    Start today by auditing your current mix sharing platforms. Implement at least one new idea from each section above. Launch a 30-day “standout DJ mix” challenge: post consistently, experiment with visuals, engage followers, and track progress. Share your best DJ mix or promotional wins in the comments or on social channels.

    Make your DJ mixes impossible to scroll past—your next fan or client could be one post away! For expert help elevating your mixes or social campaigns, contact our studio team today.

  • The Ultimate Guide to Arranging Songs for Better Impact

    The Ultimate Guide to Arranging Songs for Better Impact

    Blog Post:

    The Ultimate Guide to Arranging Songs for Better Impact

    Introduction: The Power of Song Arrangement

    Song arrangement is crucial in music production—it can dramatically influence a track’s impact on listeners. For beat-makers, producers, DJs, or DIY artists, mastering arrangement is key to engaging your audience and achieving commercial success. In today’s world, dominated by streaming platforms and more discerning listeners, crafting dynamic, impactful arrangements is essential. Many musicians face roadblocks like creative ruts and muddled mixes. This ultimate guide offers actionable tips and fresh arrangement techniques to enhance your music.

    You’ll learn both timeless insights and modern best practices, covering fundamental music dynamics and structures, DAW tools, and remix strategies. By the end, you’ll have a roadmap to harness emotional storytelling, sonic clarity, and sustained listener engagement—achieved through the art of arrangement.

    Core Elements of Song Arranging Explained

    To excel in arranging music, it’s vital to differentiate arrangement from composition and production. While composition involves creating melodies, harmonies, and rhythms, arrangement organizes these elements to guide the listener’s journey. Intros, verses, choruses, bridges, and outros all contribute to a song’s flow and emotional journey.

    Effective arrangement balances energy and progression, avoiding monotony. For example, a dance track may include a driving chorus, tension-filled breakdown, and euphoric drop, while pop songs often cycle through verse–pre-chorus–chorus structures. Hip-hop and electronic genres frequently use unexpected intros or beat switches.

    Avoid pitfalls like over-repeating elements, lacking contrasts, and cluttered mixes. Effective arrangement lets each instrument and moment shine, aligning creative intent with technical clarity.

    Pro Tip: Mute everything but core rhythmic and melodic elements periodically. This exercise reveals unnecessary layers, showcasing the unique character of each section for a powerful, engaging arrangement.

    Modern Song Arranging Techniques

    As audience habits and digital platforms evolve, so do music dynamics and structures. Modern listeners seek instant gratification, leading to trends like shorter intros and faster hooks. Successful arrangements grab attention in the first 15 seconds, using immediate vocals or drops.

    Tracks frequently employ “fake drops,” abrupt chorus entries, and dramatic breakdowns. Billie Eilish’s “bad guy,” for example, surprises with a bass-heavy switch, while electronic music often integrates lengthy breakdowns.

    The lesson? Understand classic song forms, but adapt them for contemporary listeners and platforms.

    Pro Tip: Create multiple arrangements: one traditional and one unconventional. Compare listener reactions—sometimes the unexpected wins.

    Practical Tips for Effective Arrangements

    Arranging songs blends process and creativity. Reverse-engineering favorite tracks, mapping arrangements bar by bar, teaches how to maintain energy and engagement. Alternate between looping (to refine ideas) and arranging (to build the journey).

    Some producers dedicate “arrangement days” to organizing sections and transitions. Techniques include arranging in silence, muting sections, or building songs backwards.

    Modern DAWs offer powerful arranging tools, like markers and color-coding. Separating creative and editing sessions enhances focus and productivity. Regular “ear breaks” and fresh perspectives help catch arrangement opportunities.

    Pro Tip: Color code DAW tracks by section for easier visual management—e.g., blue for intros, green for verses. This speeds up editing and highlights arrangement imbalances.

    Techniques for Clarity and Impact

    Clarity and impact in music often mean crafting contrast and motion, rather than adding more elements. Managing layers—introducing or stripping away instruments—injects dynamics and keeps sections fresh. Automation on filters, effects, and volume builds or releases tension, enhancing emotional peaks.

    Pauses, breakdowns, and single-bar silences reset listeners’ ears, setting up powerful payoffs. Highlighting key moments ensures the song’s big idea shines. Varying instrumentation and intensity between sections maximizes contrast.

    Arrangement affects mix clarity: too many layers create muddiness. Thin out sections for breathing room or use subtractive arrangement to enhance focus.

    Pro Tip: Bounce a rough mix and listen during a walk or while multitasking. Note any drifting attention or crowded moments—these cues guide arrangement tweaks.

    Case Studies: Real-World Arrangements

    Examining successful tracks helps understand strong arrangements:

    • Electronic: Flume – “Never Be Like You”: Builds mystery with sparse textures, quickens energy with early vocals, and uses dynamic breakdowns.
    • Pop: Dua Lipa – “Don’t Start Now”: Catches attention with a snappy intro, evolves energy with arrangement shifts.
    • Hip Hop: Travis Scott – “SICKO MODE”: Features radical arrangement switches, each section made for replay value.

    Analyze and “steal” at least one arrangement idea from favorite tracks—drop fake-outs, beat switches, or minimalist breakdowns.

    Pro Tip: Load tracks into your DAW and mark sections. This visual process makes arranging more accessible and repeatable.

    Equipping Your Arranger’s Toolbox

    Utilize DAW’s arrangement features, like Ableton Live’s arrangement view, clips, and markers. Essential plugins include:

    • Transition FX (risers, impacts, white noise)
    • Automation tools and multi-band compressors
    • Spectrum analyzers for frequency control

    Explore arrangement templates by genre and tap into communities and learning platforms like Sonic Academy for ongoing education.

    Pro Tip: Create an “arrangement reference” template in your DAW with pre-loaded favorite tracks. Use as real-time guides to incorporate best practices into your music.

    Conclusion: Taking Action on Better Arrangements

    Excelling in song arrangements creates standout songs in any genre. Summary checklist:

    • Utilize structure and contrast for engaging intros, hooks, and breakdowns.
    • Adapt to modern attention spans with impactful, meaningful transitions.
    • Integrate creative processes with practical DAW techniques.
    • Use automation, space, and silence to enhance clarity.
    • Treat arrangement as a mix of art and science—constant iteration and experimentation are crucial.

    Focused arrangement will lead to powerful, memorable songs that capture and retain listener interest.

  • Recording Vocals Like a Pro: Studio Secrets Every Singer Should Know

    Recording Vocals Like a Pro: Studio Secrets Every Singer Should Know

    Recording Vocals Like a Pro: Studio Secrets Every Singer Should Know

    Introduction: The Importance of Professional Vocal Recording

    Every singer aspires to capture that magical vocal take, yet the studio environment can pose challenges such as muddiness or a lack of presence. Professional vocal recording is crucial for every memorable song, whether you’re an emerging artist or a seasoned performer. Mastering how to achieve the best vocal recording in the studio elevates your artistry, allowing your unique vocal character to shine. This guide demystifies the recording process, revealing studio secrets and practical techniques that promote confidence and consistent performance. Embracing the studio process prepares you for your best performances and your most authentic takes.

    Pre-Session Preparation: Setting Up for Success

    Successful vocal sessions begin before you step into the booth. Prioritize vocal health by staying hydrated, resting well, and starting sessions with warm-ups like lip trills and humming. Avoid caffeine and dairy, opting instead for water or herbal teas. Learn your lyrics thoroughly to focus on emotion rather than memory during the session.

    Mental preparation is vital. Use breathing exercises to reduce nerves and ground yourself in the moment. Communicate with your producer or engineer ahead of time using reference tracks or detailed notes about your vision. Bring essentials like water, tea, lyric sheets, comfortable clothing, and personal items for relaxation.

    Pro Tip:
    Record home practice sessions and listen back. This helps spot weak points and gets you comfortable with your recorded sound, reducing studio anxiety and boosting session-day confidence.

    Choosing the Right Microphone & Studio Gear

    The best microphone for vocals significantly impacts your sound. Professionals often use dynamic and condenser mics—dynamics are robust, suited for loud styles, and condensers capture detail ideal for most vocals. Consider your voice type: bass-heavy voices might need brightness, while bright voices may require softening.

    If possible, do a “mic shootout” by testing different mics to find the one that complements your timbre. Don’t ignore pop filters to handle plosives and shock mounts to reduce vibrations. Ensure a comfortable monitoring setup—whether with closed-back headphones or in-ears—so you can stay on pitch and connect emotionally.

    Pro Tip:
    During initial takes, sing into multiple mics and listen back with your producer—your perfect mic is often found through real-time comparisons, not just specs.

    Creating the Ideal Vocal Booth Environment

    A well-designed vocal booth is key for professional vocal recording. In a studio, use treated spaces; at home, improvise with thick curtains, blankets, and reflection filters. Aim for an acoustically “dead” space with minimal reflections—small, sound-absorbing areas work best.

    Position yourself 6-12 inches from the mic, slightly above or below mouth height to avoid air blasts. Switch off electronics, close windows, and request quiet from housemates. Comfort boosts performance—adjust lighting, stay hydrated, and take stretching breaks.

    Pro Tip:
    Snap fingers or clap to check for echoes in your booth. Even basic treatments like duvets around the mic can significantly improve home vocal takes.

    Mastering Vocal Performance in the Studio

    Achieving your best takes requires preparation and adaptability. Settle nerves with deep-breathing or mindfulness before singing. Don’t hesitate to do multiple takes—magic may happen on take three, ten, or beyond when you stop overthinking.

    Experiment with energy and phrasing to match the song’s mood. Trust your engineer for feedback on performance and mix, and monitor vocal fatigue—rest when needed and avoid strain.

    Pro Tip:
    Record “throwaway” warm-up takes before the main session—these relaxed attempts may capture your best performances.

    Effective Collaboration with Producers and Engineers

    The studio is a collaborative space. Building rapport with producers and engineers is essential: share your vision openly and address concerns or questions promptly. If you need adjustments in your mix, voice them early. Sessions thrive on real-time feedback and collaboration.

    Understand roles: producers focus on creative direction, while engineers handle technical aspects. Don’t hesitate to request breaks or clarify feedback on vocal comping (creating a master take from best parts).

    Pro Tip:
    Establish a codeword or gesture to signal “let’s pause” or “ready to go again”—this minimizes miscommunication and keeps sessions flowing smoothly.

    Studio Secrets: Pro Tips for Superior Vocal Tracks

    Tonal variety stems from both singing and mic technique: moving closer to the mic adds warmth, while stepping back creates airiness. Layering and doubling can enhance choruses but avoid over-layering, which can muddy the mix.

    During mixing, don’t rely solely on “fix it in post”—aim for a great take that requires only minor adjustments, like gentle compression and subtle EQ. Editing for timing and tuning can polish a performance, but preserve the human feel.

    Pro Tip:
    After comping, listen in mono. If your vocals sound punchy and clear, your mix will likely translate well everywhere. An emotive, slightly imperfect take can outweigh a flawless yet sterile performance.

    Common Vocal Recording Mistakes to Avoid

    Even skilled singers can make common errors. Over-singing or excessive auto-tune strips the performance of personality. Ignoring fatigue or forcing takes can lead to lackluster results or strain. The headphone mix is vital—uninspiring sound affects your takes.

    Clear communication with the team and pacing are crucial. Don’t skip thorough warm-ups or over-rehearse to the point of exhaustion.

    Pro Tip:
    Keep a “studio checklist” with warm-ups, hydration, lyric revisions, gear needs, and discussion points. This reduces frustration and conserves stamina for top-tier takes.

    Conclusion: Enhance Your Studio Vocal Recordings

    Every singer, regardless of experience, can create radio-ready, emotionally compelling vocal tracks. By mastering recording studio tips, preparing thoroughly, and collaborating effectively, every session becomes an opportunity for artistic growth. Treat the studio as both a lab and playground—experiment, trust your team, and learn continuously.

    Are you ready to elevate your vocal artistry? Share your recording experiences in the comments, or contact us today to book a studio session or consultation. Our team of producers and engineers is eager to help you capture your unique sound.

  • Essential Home Studio Upgrades for Producers on a Budget

    Essential Home Studio Upgrades for Producers on a Budget

    Essential Home Studio Upgrades for Producers on a Budget

    Introduction: Why Upgrade Your Home Studio on a Budget?

    Building a music producer’s home studio is exciting but can be challenging with budget constraints, limited space, and the goal of achieving professional sound. Luckily, essential upgrades don’t require huge investments or a custom-built studio. Strategic, cost-effective improvements can enhance your workflow, creativity, and track quality. This guide reveals affordable upgrades for beginners and intermediate producers, focusing on practical advice that maximizes impact without overspending.

    Assess Your Current Setup: Identifying Improvement Areas

    Before investing in new equipment, evaluate your current setup. Are your mixes muddy? Is there unwanted room noise or an uninspired workflow? Identify the weak points—such as poor monitoring, acoustics, outdated gear, or inefficient layouts. Prioritize improvements that address these challenges. Setting a clear budget for each upgrade prevents impulsive purchases and ensures every dollar improves your recording and mixing work.

    Pro Tip:
    Focus on improvements that directly impact production quality, like monitoring clarity or workflow speed. Address the most problematic area first. Targeted cost-effective upgrades, like acoustic treatment, often benefit your music more than flashy gear.

    Budget Acoustic Treatment: A Game Changer

    One impactful yet often overlooked upgrade is acoustic treatment. Untreated rooms cause reflections and resonances that distort mix balance and clarity. Fortunately, DIY acoustic treatment can be affordable. Create acoustic panels with rockwool or mineral wool wrapped in fabric, targeting first reflection points on walls and ceiling. Add foam bass traps to room corners to manage low-frequency buildup.

    • Focus on sound bounce points between ears and speakers.
    • Place panels symmetrically for balanced stereo imaging.

    Test improvements by playing well-known reference tracks, noting reductions in muddiness or excess reverb. Compare DIY builds to budget pre-made options, but remember that good placement is more valuable than expensive materials.

    Pro Tip:
    Use a mirror to identify first reflection points: have a friend hold a mirror along the wall while you sit in your mixing position. Wherever you can see the speakers in the mirror is a prime spot for acoustic panels.

    Key Hardware Upgrades without Breaking the Bank

    Affordable production gear doesn’t mean compromising quality. Brands like Yamaha (HS series), KRK (Rokit), and Kali Audio offer reliable studio monitors at good prices—and buying used can further save costs. If you’re using consumer speakers, this upgrade can significantly enhance your mixing abilities. For budget audio interfaces, entry-level models from Focusrite (Scarlett), Behringer (UMC series), or PreSonus (AudioBox) offer clear preamps and low latency.

    Entry-level mics like the Audio-Technica AT2020 or Shure SM57 provide value and versatility for vocals and instruments. Pair these with quality cables, a sturdy stand, and an inexpensive pop filter for improved sound and workflow. Budget headphones such as Audio-Technica ATH-M40x offer vital second perspectives when mixing in untreated rooms or at night.

    Pro Tip:
    For used gear, always test before buying or ensure a reputable return policy. Check classified sites, local music stores, and ‘for sale’ groups, verifying condition and accessory availability.

    Cost-Effective Software and Plugin Options

    Great music stems from creativity, not just expensive software. Beginning with your stock DAW plugins teaches critical skills, so make the most of these tools before seeking paid alternatives. For those expanding, explore affordable or free plugins like TDR Nova (EQ) or Valhalla’s free reverb. DAWs like Tracktion Waveform Free and Cakewalk by Bandlab offer robust features without cost.

    Visit sites like Plugin Boutique or Bedroom Producers Blog for limited-time bundles and sales to obtain essential plugins affordably. Don’t overlook workflow enhancements: free meters, analyzers, and MIDI utilities significantly reduce your production time.

    Pro Tip:
    Establish a weekly routine of checking free plugin roundups and subscribe to developer newsletters to build a diverse collection of tools without straining your budget.

    Enhancing Workflow and Ergonomics in Small Spaces

    A cluttered workspace can drain creativity and productivity. Enhance efficiency with a robust, ergonomic desk and adjustable chair. Simple cable management, like velcro straps or under-desk trays, keeps your space organized. Use wall-mounted shelves or stackable bins for tidy peripheral storage.

    Keep essential equipment within arm’s reach and prioritize desk space for essentials like interfaces and monitors. Add personal touches—posters, lights, plants—to inspire creativity during longer sessions. Physical comfort and organized spaces translate into mental clarity and more productive sessions.

    Pro Tip:
    Sketch your studio layout before moving equipment to discover ways to optimize space and streamline your workflow without physical hassle.

    Getting the Most from Existing Gear

    Some of your best gear might already be in your possession—used in creative ways. Repurpose closed-back headphones as tracking mics or use an old interface for re-amping. Regular maintenance, like cable checks and monitor recalibration, is crucial. Listen to professional tracks on your setup to fine-tune your ears to your studio’s quirks.

    Boost productivity with DAW shortcuts and custom macros. Join online forums and groups to access producer insights and budget studio hacks that save money while elevating your setup.

    Pro Tip:
    Use a budget-friendly SPL meter app on your phone to balance speaker levels, avoiding ear fatigue and improving mixing consistency and gear longevity.

    Conclusion: Upgrading on a Budget – Moving Forward

    Enhancing your home studio doesn’t mean overspending on the fanciest gear. With strategic, affordable upgrades, you can improve sound quality, workflow, and creative output without financial strain. Focus on incremental changes—begin with the most limiting aspect of your setup and refine as your skills and needs evolve.

    Stay inquisitive, keep learning, and be open to studio modifications as you find what works best. If you have questions or want to share your cost-effective studio upgrades, share below or reach out—we’d love to hear your experiences!

    Ready for more? Download our free checklist of affordable studio upgrade ideas or subscribe for expert home studio production tips, maximizing studio sound, and more beginner music production insights.

  • How DJs Can Create Irresistible Social Media Content with Custom Audio

    How DJs Can Create Irresistible Social Media Content with Custom Audio

    How DJs Can Create Irresistible Social Media Content with Custom Audio

    Introduction: Transform Your DJ Social Media Strategy with Custom Audio

    For today’s DJs, a vibrant social media presence is not just beneficial—it’s integral. Whether you’re a newcomer or a seasoned pro, DJ social media content is your ticket to building a stellar reputation, engaging with fans, and securing gigs. However, many DJs struggle to generate fresh content and distinguish themselves amidst the digital noise. How can you consistently innovate? How can you translate your musical prowess into captivating, scroll-stopping clips?

    Custom audio for DJs helps you stand out from generic mixes and reposts. Creating exclusive soundbites, snippets, or stingers that are uniquely yours enables you to convey personality, showcase your style, and enhance recognition. The payoff includes increased engagement, a distinctive sonic identity, robust DJ branding, and a higher likelihood of your content going viral.

    This guide provides actionable tips to craft irresistible custom audio content, repurpose DJ mixes for different platforms, and master short-form audio best practices. Ready to elevate your social media game? Let’s dive in.

    The Influence of Audio Branding and Remix Culture in the Digital World

    Audio branding, far from just a buzzword for top artists, is a cornerstone of successful DJ social media at any career stage. It involves cultivating a recognizable sonic identity: a unique drop, jingle, or motif listeners readily associate with you. This continuity in your content helps you rise above the crowded digital sphere.

    Custom audio is integral to the remix culture thriving on platforms like TikTok and Instagram. Here, creative reinterpretations can lead to viral success, much like A-Trak’s iconic scratch intros or Diplo’s vocal tags, which are as memorable as their visuals. Even local DJs use personalized DJ drops or hybrid snippets to brand their Instagram reels and TikTok challenges.

    Remember, you don’t need a vast following to start; a simple audio tag or self-made jingle can begin building your DJ persona. Always be mindful of copyright laws—ensure you clear samples, especially when distributing content commercially.

    Pro tip:
    Create a 2–3 second audio stinger, such as your DJ name with a distinctive effect or melodic phrase, to include in all videos. This becomes part of your brand’s essence, much like a podcast’s familiar intro.

    Creative Ways to Transform Sets and Mixes into Shareable DJ Content

    The best DJ content ideas for TikTok and Instagram hinge on adaptability. An hour-long mix or live event can yield numerous short, music-driven social posts if you focus on the highlights. Here’s how:

    • Teaser Mixes: Break your sets into 15–45 second “hype reels,” spotlighting key transitions or standout drops.
    • Genre Mashups: Combine unexpected genres for a quick burst of energy, perfect for Instagram reels.
    • Before/After Snippets: Showcase the raw, unmixed track followed by your DJ-enhanced version to tell a behind-the-scenes story.
    • Interactive Challenges: Share a clip inviting fans to vote on your next remix or participate in remixing your original segments.
    • Crowd Reactions: Mix footage of dancefloor energy with your custom audio to captivate fans with real-world responses.
    • Recurring Themes: Start a “series” (e.g., #MondayMashups) using a leitmotif or sound to build anticipation.

    Sync your audio creativity with trending visuals, such as split screens and fast cuts, to multiply the reach of your promotional strategies.

    Pro tip:
    Leverage your DJ software’s cue feature to isolate standout transitions or drops from your gigs. Combine them with visually striking video (e.g., backstage moments or visualizers) to craft “DJ mix teasers” for social media.

    Technical Tips for Mastering Short-Form Audio on Social Platforms

    Each short-form video platform has quirks that impact your audio’s effectiveness. Here’s how to give your custom audio an edge:

    • Ideal Lengths: For Instagram Reels and TikTok, aim for 10–30 second audio snippets. YouTube Shorts allows up to 60 seconds, but shorter snippets often perform better.
    • High-Quality Audio: Utilize DJ software (Serato, Rekordbox) or a DAW (Ableton, FL Studio) to trim, EQ, and export high-res WAV/MP3 files. Monitor levels to ensure impact without clipping.
    • Audio Drops & Tags: Incorporate personalized vocal drops or watermarks, especially at the intro, to bolster sonic recognition and branding.
    • Music vs. Voice: Mix commentary at -5 to -10 dB below the music for clarity on mobile devices.
    • First Impressions Matter: Engage listeners immediately. A compelling beat, spoken word, or effect in the first 3 seconds boosts watch time and engagement.
    • Platform Trends: Observe trending audio and visual effects but add your unique spin to avoid sounding generic.

    Pro Tip:
    Batch-create custom audio clips and maintain a ready-to-go snippet folder. This allows you to jump on trends or post new content swiftly—essential for best social media practices.

    Amplifying Your DJ Identity and Reach Through Consistency and Interaction

    A wealth of custom audio is impactful only with consistent posting and interaction. Regularity in content themes and audio snippets enhances fan recognition, amplifying your DJ presence online.

    Use your DJ content to reinforce your persona. Engage fans with polls for track remixes, address remix requests publicly, or launch hashtag challenges around your branded drops. Collaborations broaden your reach—initiate audio duets, swap mix snippets, or feature clips from other producers.

    Analyze which formats, audio snippets, and stories boost your DJ social media engagement most effectively. Use strong captions, effective hashtags, and cross-promotion (e.g., Reels to Stories or Shorts to TikTok) to further extend your reach.

    Pro tip:
    Establish a consistent posting schedule: drop a “weekend warmup” snippet every Friday or host a monthly remix challenge featuring your unique sound. Routine heightens engagement, as fans anticipate regular updates.

    Conclusion & Call to Action

    Custom audio for DJs opens new horizons for creating engaging DJ social media content. By crafting a unique sound and utilizing concise, branded audio snippets, you can boost engagement, strengthen your brand, and distinguish yourself on platforms like Instagram Reels and TikTok.

    Ready to elevate your social media presence? Choose one tactic from this guide—whether it’s creating a signature DJ drop, developing serialized audio, or remixing trending tracks—and implement it this week. Experiment, monitor outcomes, and continuously expand your unique DJ content library.

    Share your latest audio snippets and tell us about their performance! Join our community or comment below to exchange ideas with fellow DJs. Need further assistance? Explore our recommended tools, edit packs, and free guides on creating branded DJ audio clips.

    Eager to accelerate your strategy? Contact us to discover our DJ-focused music production, content planning, and social media promotion packages.

  • Recording Vocals Like a Pro: Studio Tips for Singers and Artists

    Recording Vocals Like a Pro: Studio Tips for Singers and Artists

    Recording Vocals Like a Pro: Studio Tips for Singers and Artists

    Introduction: Mastering the Art of Professional Vocal Recording

    Recording vocals at a professional level might seem daunting, especially if you’re new to the studio environment. While quality equipment and technical expertise can help, the right approach is fundamental. Pro-quality vocals capture performance, emotion, and clarity that meet listeners’ expectations. This guide provides essential tips and steps for preparing for a vocal session, enabling you to achieve stellar results whether in a state-of-the-art studio or during a home recording session. These techniques will help you sound your best, regardless of your starting point.

    1. Preparing Yourself and Your Space for Optimal Vocal Recording

    Setting up your recording environment correctly is crucial for success, particularly for home studio vocal recordings. Start by minimizing noise and reflections: close windows, turn off noisy appliances, and use thick blankets or acoustic panels to reduce sound bounce. Creating a makeshift booth with duvets can also enhance results. Setting the mood is equally important: adjust lighting, keep hydrated, and get comfortable. Keep lyrics, water, a notepad, and essentials within arm’s reach. Prepare your vocal chain by connecting your microphone to a quality preamp or audio interface, testing your headphones, and securing your pop filter. These steps ensure a smooth creative process and the best sound quality.

    Pro Tip:
    Spend 10 minutes clapping around your recording area before beginning. Listen for echoes or flutter and place cushions, bookshelves, or curtains where needed to eliminate harsh reflections, transforming basic rooms into singer-friendly booths.

    2. Choosing and Setting Up the Best Microphone for Your Voice

    Selecting the right microphone is vital but doesn’t have to be complicated. Condenser mics are the preferred studio choice, offering detail and sensitivity ideal for most vocals. Dynamic mics handle powerful or aggressive vocals, and ribbon mics add smoothness and warmth. If possible, test various mics to find the best fit for your voice and genre. Always use a pop filter to handle plosives and a shock mount to reduce vibrations. For placement, position the mic slightly above mouth level and angle it downward, about 6–10 inches from the singer—closer for softness, further for powerful belting.

    Pro Tip:
    Record a few test phrases at varying distances before your session to compare clarity and presence. Use headphones to identify room bleed or “S” sounds and adjust accordingly.

    3. Effective Vocal Warm-Ups Before Recording

    Warming up before recording is essential for consistent and healthy vocal takes. It prepares your cords and prevents strain. Stick to reliable routines like lip trills, gentle scales, and controlled breathing exercises. Stay hydrated and avoid caffeine or dairy. Don’t push your voice; aim for flexibility, not fatigue. A short burst of dynamic exercises like humming or “sirening” just before recording can settle nerves and add energy to your first take.

    Pro Tip:
    Finish your warm-up 5–10 minutes before your first take and use a mirror to check your posture and jaw alignment. Visual feedback keeps your technique sharp and reduces tension.

    4. Building Confidence and Comfort in the Studio

    Studio nerves, or “red light syndrome,” can affect even experienced singers. Combating them starts with physical comfort—wear loose clothing, ensure a comfortable headphone mix, and take frequent breaks to prevent fatigue. Practice with your backing track and headphones to focus on precision. Multiple takes are a part of studio work, so embrace experimentation. Communicate your needs to your engineer to feel more at ease and supported, leading to stronger performances.

    Pro Tip:
    Use deep breathing or gentle exercises like arm and leg shakes to ground yourself, steady your nerves, and focus on delivering an authentic performance.

    5. Perfecting Your Vocal Performance in the Studio

    Achieving a polished vocal sound involves solid techniques and studio habits. Maintain consistent mic distance and adjust for dynamics. Manage breath control to avoid volume spikes and distortion. Proper gain staging is crucial; set levels so your loudest notes don’t clip. Instead of chasing perfection, record multiple passes and use comping for a natural final result. Capture raw, emotional takes first, and add effects or pitch correction subtly later.

    Pro Tip:
    Record a “scratch track” as a reference before serious recording begins. It eases pressure and helps pinpoint areas for improvement in later takes.

    6. Effective Communication with Studio Engineers

    Successful vocal sessions are collaborative. Whether you’re working with an engineer or managing your own setup, clear communication is key. Familiarize yourself with basic studio terms to confidently request adjustments. Express your needs clearly, whether it’s needing more reverb in headphones or solving instrumental bleed. Even in DIY setups, narrate your thoughts throughout the session to yourself. Strong communication fosters trust and ensures a smooth process and excellent results.

    Pro Tip:
    Bring specific references—songs, vocal tones, or effects you admire—and play them for your engineer to align expectations for your desired sound.

    7. Reviewing and Editing Your Vocal Takes Post-Session

    After the session, it’s time for objective review. Listen carefully to identify which takes capture the desired emotion and technical quality. Use simple DAW editing to remove noise, adjust timing, and apply light pitch correction if needed. Beginners should not over-edit; excessive tweaks can detract from authenticity. Trust your ears, and consider professional help for challenging edits. Always back up raw takes, as they may be valuable for future work.

    Pro Tip:
    Label your takes with real-time notes like “Best take – verse 2” during playback. This speeds up editing processes and makes future revisits more efficient.

    Conclusion and Call to Action

    Recording vocals like a pro isn’t solely about expensive gear; it’s about strategic preparation, effective communication, and consistent practice. With each session, at home or in a full studio, your confidence and skills will grow. Embrace these vocal recording techniques, and you’ll produce more professional and stress-free tracks.

    Ready for your next vocal session or need advice on your home setup? Explore more expert vocal recording tips, download our free “Vocal Recording Checklist,” or reach out for personalized advice. Share your experiences in the comments—we’re here to help you make every vocal take your best yet!

  • 10 Essential Mixing Tips for Beginner and Intermediate Producers

    10 Essential Mixing Tips for Beginner and Intermediate Producers

    10 Essential Mixing Tips for Beginner and Intermediate Producers

    Introduction: Why Mixing Matters for Home Producers

    Looking for mixing tips for beginners or aiming to elevate your music production skills? You’re on the right track. Mixing is the transformative phase where a raw track becomes a polished record, enhancing clarity, impact, and professional quality. However, home producers often face challenges like muddiness, frequency overlap, and instrument masking, resulting in tracks that sound amateurish. Fortunately, with a strategic approach and practical music production mixing tips, you can achieve professional sound—even from a modest home studio. This step-by-step mixing guide offers 10 actionable techniques to enhance your mixes. By adopting the best mixing practices for small studios, you’ll cultivate better habits—one mix at a time.

    Tip 1: Establish a Clear Vision for Your Mix

    Before reaching for EQs or effects, define what your finished mix should achieve. Using reference tracks helps set benchmarks for loudness, tonal balance, dynamics, and spatial elements. Identify the core aspects—such as a punchy kick or clear vocal—and prioritize their importance. Avoid the urge to “fix as you go.” Instead, draft a quick static mix to maintain focus and prevent endless tweaks. Always consider listener experience on various playback systems as you shape your mix’s direction.

    Pro Tip:
    Import a professional reference into your DAW and frequently compare your mix at equal loudness. Examine how their balances, depths, and instrument separations measure against yours, using this as a guide throughout your mixing process.

    Tip 2: Start with a Clean Slate: Gain Staging and Organization

    Proper gain staging is key to achieving great mixes—it provides headroom, prevents distortion, and uncovers hidden details. Reset your faders to zero and adjust audio clip gains so peaks hit around -18 dBFS. Organize your DAW by color-coding tracks, clearly labeling channels, and creating groups for different instruments. A well-organized session speeds up your workflow and aids in better decision-making.

    Pro Tip:
    Create track templates with pre-set routing, groups, and color codes for your DAW. This ensures every new project begins organized, letting you concentrate on creativity rather than administration.

    Tip 3: Tame Muddiness with EQ: Frequency Management

    Many new mixers struggle to avoid muddiness in music mixes, often due to frequency masking. This occurs when multiple instruments occupy the same frequency ranges. Learn EQ basics: apply gentle high-pass filters to eliminate unnecessary low frequencies, cut overlapping mids between bass and kick, and remove boxiness from drums. Utilize spectrum analyzers to visualize frequency conflicts but trust your ears for final adjustments. Subtle adjustments maintain a natural and vibrant mix.

    Pro Tip:
    Solo an instrument and sweep a narrow EQ band to identify problem frequencies. Cut gently where excessive mud, honk, or harshness is detected, and compare before and after to ensure improvements without hollowing out the sound.

    Tip 4: Achieve Balance with Volume and Panning

    The key to home studio mixing advice is achieving a solid volume and stereo balance. Begin with a static mix to ensure every element is audible. Use panning for width and separation: center core elements like kick and vocals, and pan supporting instruments for space. Avoid extreme panning unless it serves a creative purpose. Automated fader rides or panning changes can infuse your mix with energy.

    Pro Tip:
    Experiment with LCR (Left-Center-Right) panning for basic mixes, then refine placements as your taste evolves. Occasionally monitor in mono to catch phase issues and ensure clarity across all instruments.

    Tip 5: Compression—Control and Character

    Compression is vital for controlling dynamics and adding cohesion. Set the compressor’s threshold to manage peaks, adjusting attack and release to suit the source. Use parallel compression on elements like drums for energy without diminishing dynamics. Apply subtle bus compression for overall “glue,” avoiding high ratios that could squash your mix’s energy. Monitor for over-compression signs like dullness or transient loss.

    Pro Tip:
    Apply 2-4dB of gentle reduction on your drum or vocal bus with a slow attack and medium release. Blend the compressed signal with the dry to retain natural movement with added intensity.

    Tip 6: Using Effects Tastefully (Reverb, Delay, etc.)

    Effects such as reverb and delay enhance depth and emotion. Beginners often overuse them, leading to cloudy mixes. Utilize send/aux channels for most spatial effects to apply them subtly. Short reverbs like room or plate types add presence without overwhelming. Experiment creatively with delays but maintain clarity.

    Pro Tip:
    Use low- and high-pass filters on reverb sends to eliminate muddy lows and harsh highs. Focus on the lushness you desire without clouding the mix.

    Tip 7: Group and Buss Processing for Cohesion

    Buss or group processing applies effects to collections of tracks, optimizing CPU use and unifying the mix. Typical groups include drums, vocals, and effects. Try gentle EQ or compression on a drum buss or use saturation for warmth on vocals. Avoid excessive processing on the master bus and focus on shaping your mix’s broad strokes first.

    Pro Tip:
    Ask if a group EQ or compressor could achieve desired results with fewer plugins before tweaking individual tracks. Start from the broader mix and refine details later.

    Tip 8: Check Your Mix on Different Systems

    Mixes seldom translate perfectly from monitors to other audio systems. Test your mix on headphones, earbuds, mobile devices, and car stereos. Take notes on bass presence and vocal clarity. This helps address hidden muddiness or imbalances and enhances playback compatibility. Regularly check mono compatibility to prevent phase issues.

    Pro Tip:
    After finalizing your mix, listen on a challenging device like a phone or small speaker. Note any critical elements that disappear or overpower others, and adjust accordingly.

    Tip 9: Avoiding Common Mixing Mistakes

    No step-by-step mixing guide for new producers is complete without warnings about common pitfalls. Over-processing, such as excessive plugin use, impacts clarity. Neglecting gain staging, organization, or phase alignment can lead to technical issues. Take 5-10 minute breaks every 45 minutes to combat ear fatigue and mix at moderate volumes to maintain clarity.

    Pro Tip:
    Set a timer for regular breaks. Returning with fresh ears boosts objectivity and mix quality more effectively than any plugin.

    Tip 10: Develop a Consistent Mixing Workflow and Trust Your Ears

    Consistency turns random successes into repeatable results. Break the mix into stages: (1) static balance, (2) rough mix, and so forth. Trust your ears throughout and refine your workflow until it becomes second nature. Your expertise grows as you internalize techniques through practice.

    In conclusion, these essential mixing tips for beginners and intermediate producers offer a comprehensive foundation for crafting professional mixes. By mastering each step, you’ll enhance your skills and achieve greater confidence in your home studio.

  • Mastering Vocals: Tips for Artists and Producers

    Mastering Vocals: Tips for Artists and Producers

    Mastering Vocals: Tips for Artists and Producers

    Introduction: The Importance of Vocal Mastery

    For your music to resonate with audiences, mastering vocals is a crucial step that artists and producers cannot ignore. Vocals often form the core of a track—the part listeners remember and sing along with. In music production, “mastering vocals” involves polishing and refining the final vocal mix to ensure it sounds clear, powerful, and professional on any playback system. While vocal mixing balances individual tracks within a song, vocal mastering enhances this balance for the final release—addressing tone, loudness, and consistency to align with industry standards. Achieving commercial-grade vocal clarity, managing harsh frequencies, or properly integrating vocals into mixes often challenge many artists and producers. This article offers actionable vocal mastering tips, essential insights, and workflow secrets to elevate your vocal production, whether you’re a seasoned professional or just starting.

    Pre-Mastering: Setting the Foundation for Success

    Before you delve into mastering, ensure you have a clean, well-recorded vocal track. Mastering cannot fully correct problems that should have been addressed earlier. Start with effective vocal comping by selecting the best takes and correcting timing issues using manual alignment or pitch correction tools as needed. Clean up unwanted noise, mouth clicks, excessive breaths, and artifacts through tools or manual editing. Focus on tuning; not all pitch correction needs an artificial sound, allowing subtle corrections to maintain a natural vibe. Ensure the vocal sits well in the pre-mastered mix, avoiding frequency clashes with instruments and maintaining the track’s energy.

    Pro Tip:
    Before mastering, export a “vocal only” stem and listen to it both in isolation and within the full mix. Minor issues such as inconsistent cuts or odd pops are easier to catch and fix at this stage.

    Essential Tools and Plugins for Vocal Mastering

    An effective vocal mastering process requires a suite of best plugins, each serving a distinct purpose. Start with an EQ to shape tone, removing muddiness or harshness. A compressor will manage vocal dynamics, ensuring clarity on each word. Use a de-esser to tame harsh sibilants like “s” and “t” without dulling brightness. A limiter avoids clipping and boosts overall loudness, while subtle saturation can add warmth or analog character. Include tools like clean vocal techniques plugins for noise removal or transient shaping. The plugin chain order is crucial: typically start with EQ, followed by compression, de-essing, saturation, and finally, limiting. Premium plugins (e.g., FabFilter Pro-Q, Waves) offer advanced features, but excellent free options (TDR Nova, Melda) also exist for beginners.

    Pro Tip:
    Organize your DAW workflow for vocal mastering from broad to specific (EQ → compression → de-esser → saturation → limiter). Experiment with plugin order to hear subtle differences—placing the de-esser before compression can achieve a cleaner sound.

    Step-by-Step Guide to Vocal Mastering

    1. Set Your Goals: Identify what you want to enhance—presence, warmth, or clarity? Let the song style and reference tracks guide you.
    2. EQ: Use a high-pass filter to clean sub-lows, reduce boomy mids (200–500 Hz), and add “air” above 10 kHz for brightness. Apply minimal EQ boosts/cuts.
    3. Compression: Employ gentle compression (2:1 ratio, 1–3 dB reduction) to manage peaks while preserving dynamics.
    4. De-Essing: Target harsh sibilants (typically 5–8 kHz) with a de-esser to reduce them without losing excitement.
    5. Limiting: Increase overall vocal loudness with a limiter but avoid over-limiting to maintain vocal liveliness.
    6. Saturation: Add harmonic excitement or analog warmth using tape or tube emulation.
    7. Automation: Automate volume to highlight dynamic sections, ensuring steady loudness and emotional delivery.
    8. Reference: Compare your vocals with commercial tracks in your genre, aiming to match loudness and clarity.
    9. Mono Compatibility: Sum your mix to mono, ensuring vocals remain clear across all playback devices.

    Pro Tip:
    Mix using both studio monitors and basic headphones to simulate real-world listening environments. Bounce quick MP3s to test in diverse settings like cars or phone speakers, ensuring translation and mastering effectiveness.

    Genre-Specific Vocals: Tailored Mastering Approaches

    Mastering vocals across different genres demands a flexible approach. In pop music, strive for bright and clear vocals, often with modern effects. Hip-hop thrives on dry, impactful vocals, emphasizing articulation. Rock may require more grit and midrange presence, while EDM benefits from creative vocal processing and heavy compression to cut through dense mixes. Study top songs in your genre to understand variations in tone, reverb, and vocal placement. For hybrid genres, experiment while letting the vocal’s emotional message guide your choices.

    Pro Tip:
    Import genre-specific reference tracks into your DAW and continuously compare your mix against these to fine-tune vocal tone, presence, and dynamic range.

    Common Vocal Mastering Pitfalls and How to Avoid Them

    Even seasoned engineers face pitfalls that affect final vocal production quality. Over-compression can sap life from a performance; use conservative ratios and thresholds to maintain dynamics. Over-EQing can introduce phasing issues; make precise, small adjustments with wide Q settings. Be mindful of phase alignment and stereo image, as these can cause thin-sounding vocals. Recognize the importance of a proper listening environment: calibrate monitors and carefully assess untreated rooms. Trust your ears over plugin presets; adjust based on the song’s needs. Always test your masters on various devices, including mono and budget speakers, to uncover potential weaknesses.

    Pro Tip:
    After finishing your mix, take a break. Come back with fresh ears or involve a trusted collaborator for feedback. Distance and second opinions can highlight flaws you missed.

    Achieving Professional-Clarity Vocals

    Achieving clean vocal techniques doesn’t always require more tools. Often, less is more, with subtle EQ, light compression, and gentle de-essing providing clarity without losing character. Carefully manage gain staging throughout the vocal chain. For reverb, delay, or modulation, sync to the song’s tempo and use filtering to avoid muddying the vocal. Automate volume and processing for interest and impact. In dense mixes, carve space with subtle EQ cuts on other instruments. A proactive mindset is essential: be ready to experiment, patient with the process, and prioritize analytical listening. Sometimes, knowing when to hire a mastering engineer is as essential as doing it yourself.

    Pro Tip:
    Automate EQ and compression settings during dynamic vocal sections to enhance presence without losing control. This can add life static processing misses.

    Conclusion & Call to Action

    Mastering vocals requires combining art and science, demanding careful preparation, a solid toolkit, step-by-step processing, and attentive listening. Whether mastering vocals in a home studio or refining for professional releases, success lies in consistent practice and attention. Experiment with new tools, reference commercial tracks, and learn from both successes and errors. For more guidance, explore our tutorials, courses on vocal processing, and plugin recommendations.

    We’d love to hear your vocal mastering tips—share them in the comments below. Ready to improve your track with these tips? You’ll notice a significant boost in vocal clarity and impact. If you seek support from experienced engineers, reach out and elevate your vocal production to a true professional level.