Category: Vocals

  • How to Make Your Vocals Shine: Recording & Mixing Secrets for Singers

    How to Make Your Vocals Shine: Recording & Mixing Secrets for Singers

    How to Make Your Vocals Shine: Recording & Mixing Secrets for Singers

    Introduction: The Importance of Vocal Shine

    Captivating listeners hinges on making your vocals shine, whether you’re sharing demos, uploading to streaming platforms, or performing live. Achieving stellar vocal clarity is not limited to professional studios; anyone can produce pristine, emotive vocals with the right approach. Yet, many singers face challenges with muddy or lifeless recordings at home, leading to frustration. The good news? You can attain a polished, professional sound with practical vocal recording tips and careful mixing techniques—without the need for expensive gear or advanced degrees.

    This guide will teach you how to record professional vocals at home, from setting up your space, selecting the best microphones for vocals, to crafting a vocal chain that adds presence and excitement. Whether you’re a beginner or refining your DIY vocal recording process, these proven strategies provide actionable steps to make your vocals stand out. Ready to elevate your vocal tracks? Let’s dive in.

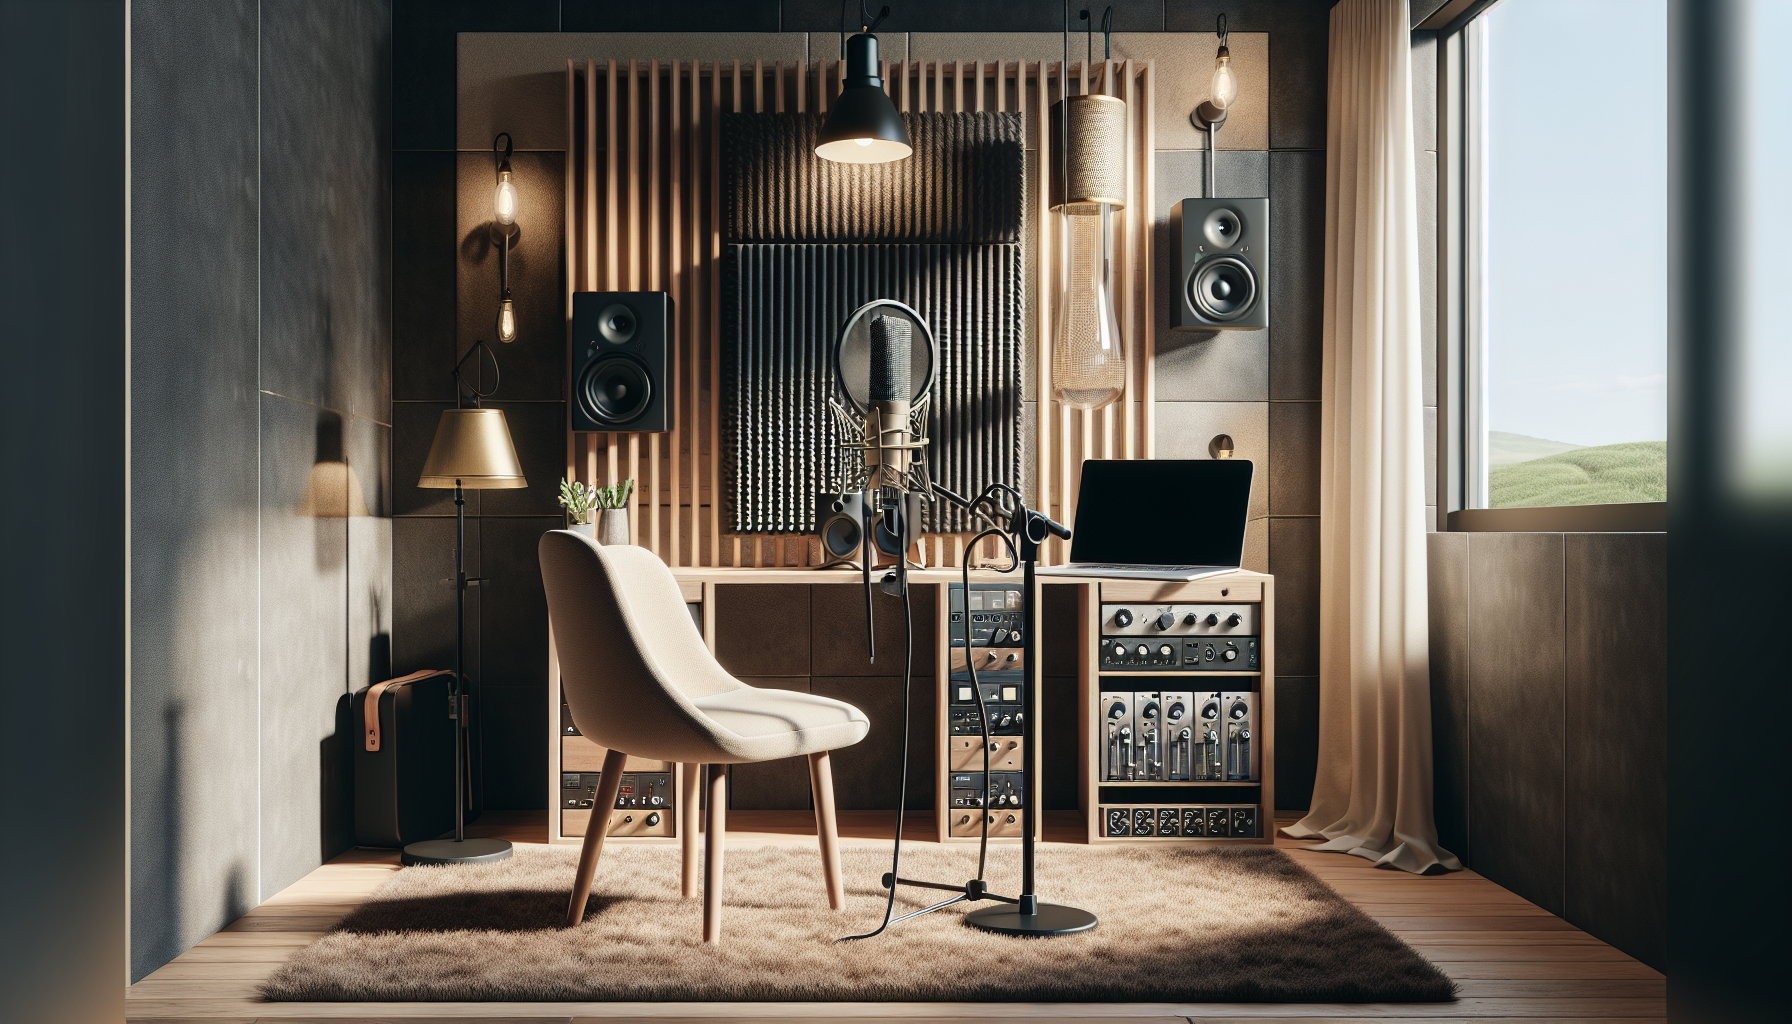
    Section 1: Creating an Optimal Recording Environment

    Exceptional vocal tracks start with your recording environment. Room acoustics play a crucial role in achieving vocal clarity and presence. Proper acoustics ensure your vocals remain distinct and not buried in the mix. An untreated room can introduce unwanted reflections, boxiness, and reverb that no plugin can fix.

    • Control Reflections: Use blankets, mattresses, or acoustic foam panels to reduce flutter echoes and ringing tones. Closets full of clothes can serve as cost-effective vocal booths.
    • Minimize Noise: Turn off fans, appliances, and close windows. Consider a dynamic microphone in noisy spaces.
    • Room Size and Placement: In small rooms, record away from walls and corners to reduce low-frequency buildup. Test different spots by singing and clapping to find where your vocals sound most balanced.

    Pro Tip:
    Clap around your space to identify flutter echoes or ringy tones—treat these areas with extra absorption materials until your clap sounds clear and controlled.

    Section 2: Selecting the Perfect Microphone for Your Voice

    A critical element for home recording is the microphone. Choosing the right mic, whether dynamic or condenser, significantly impacts how your vocals stand out. Condenser microphones are renowned for their sensitivity and detail, while dynamic mics are durable and often reduce background noise.

    • Vocal Style and Genre: Condensers complement smooth pop and R&B vocals; dynamics suit punchy rock or rap.
    • Affordable Picks: Beginners can try the Audio-Technica AT2020 (condenser), Shure SM58 (dynamic), or Rode NT1-A.
    • Essential Accessories: Use a pop filter for plosives and a shock mount to dampen vibrations.
    • Mic Technique: Sing 4–8 inches from the mic, slightly off-axis, to minimize sibilance, and keep the mic at mouth height for a natural tone.

    Pro Tip:
    Record a short vocal line with different mics and distances, then compare the results. The best mic enhances your unique timbre, not just your budget.

    Section 3: Mastering Vocal Recording Techniques

    Beyond performance, capturing clean vocals is essential. These DIY recording techniques can elevate your recordings:

    • Gain Staging: Set your audio interface gain so peaks reach between -10 to -6 dBFS to avoid clipping that’s irreversible.
    • Warm Up: Engage in 10–15 minutes of vocal warmups to unlock range and prevent strain.
    • Consistency: Maintain even energy and posture; mark your standing spot for consistent results.
    • Multiple Takes: Record several takes and “comp” the best phrases together.
    • Track Layers: Add doubles, harmonies, and ad-libs for professional dimension.
    • Headphone Monitoring: Use closed-back headphones and adjust levels for natural, in-tune performances.

    Pro Tip:
    To tame aggressive sibilants and plosives, sing slightly off-axis during bright sections—this helps during editing.

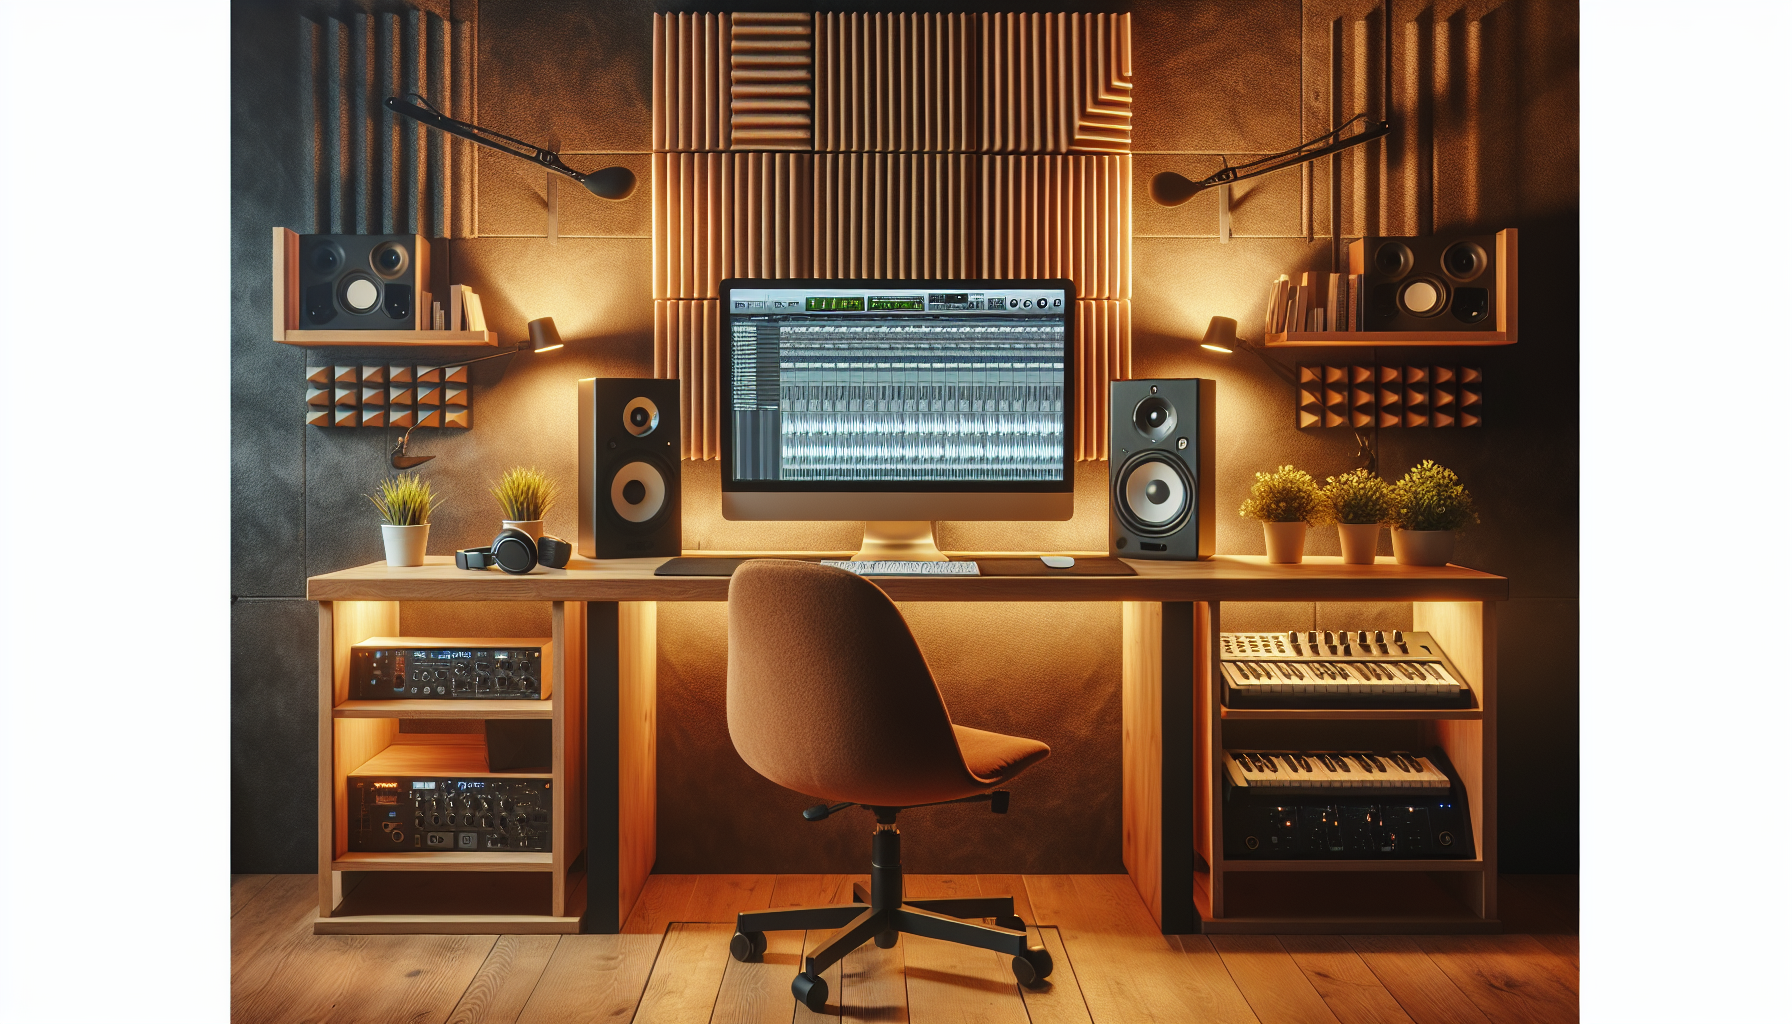
    Section 4: Beginner-Friendly Mixing Techniques to Make Vocals Pop

    Mixing is where vocal magic occurs. Basic techniques can reveal rich details and ensure vocals sit well in the mix. Here’s a straightforward approach:

    • Editing: Clean up timing, remove unwanted noise, apply a gentle de-esser, and use pitch correction sparingly.
    • Vocal Chain: Use subtractive EQ to cut muddy lows (below 80Hz–120Hz) and boost 2–5kHz for clarity. Consider a low shelf for warmth if necessary.
    • Compression: Set a ratio of 2:1–4:1, an attack of 10–20ms, and aim for 3-6dB of gain reduction.
    • Vocal Effects: Add subtle plate or hall reverb and a slight slapback delay for spatial presence.
    • Balancing: Use automation for gain control and gently pan backing tracks for separation.
    • Plugins: Consider iZotope Nectar Elements, Waves CLA Vocals, or free plugins like TDR Nova and Melda Production.

    Pro Tip:
    Experiment with parallel compression by heavily compressing a duplicate vocal track and blending it with the original for added punch.

    Section 5: Advanced Troubleshooting Tips and Common Vocal Issues

    Despite best efforts, vocal issues may arise. Here are solutions to common problems in home studios:

    • Sibilance and Plosives: Use a de-esser or automate volume dips, and prevent issues with a pop filter and correct mic positioning.
    • Boxy or Muffled Vocals: Use EQ between 200Hz–500Hz to cut resonances; gently boost 120Hz and 3kHz for thin vocals.
    • Layering Techniques: Pan harmonies and ad-libs wide, and use chorus effects for depth.
    • Automation for Dynamics: Automate volume rides and selectively apply effects for excitement and focus.
    • Mix Referencing: Compare your mix to commercial tracks for guidance on vocal tone and balance.
    • Seek Expertise: If your mix is problematic, export stems for collaboration with a mix engineer or use online services for expert opinions.

    Pro Tip:
    Use the “car test” to ensure vocal clarity across different environments—play your track on various devices until balanced vocals are achieved.

    Conclusion & Action Steps: Elevate Your Vocal Recordings

    Achieving professional vocals relies on smart choices and process refinement. From optimizing your recording environment in small rooms to mastering vocal mixing techniques, keep in mind: Every detail counts in transforming your vocal tracks into captivating masterpieces.

  • EQ vs. Compression: When and How to Use Them in Your Mix

    EQ vs. Compression: When and How to Use Them in Your Mix

    EQ vs. Compression: When and How to Use Them in Your Mix

    Introduction: Mastering EQ and Compression in Mixing

    Understanding EQ vs. compression is essential yet often puzzling for newcomers exploring audio mixing basics. EQ (equalization) lets you manipulate sound frequencies, while compression manages dynamic range, controlling volume differences between loud and soft parts. If your mixes sound muddy or over-processed, don’t worry—this guide is here to help. Aimed at beginner to mid-level producers, DJs, and artists, this article offers actionable advice, real-world examples, and practical rules to create cleaner, more professional-sounding mixes through effective use of EQ and compression.

    What is EQ? Equalization’s Role in Your Mix

    EQ (equalization) is your tool for frequency shaping, letting you boost, cut, or tailor specific parts of the frequency spectrum in any audio signal. Need to remove rumble from a vocal, brighten a dull snare, or fit elements together in the mix? EQ is essential. You’ll often encounter parametric (fully adjustable frequency/width/gain), graphic (fixed frequency bands), and shelving EQs (raise/lower frequencies above/below a point).

    • Cutting muddiness: Use a gentle cut around 200-500 Hz on vocals or mix bus for clarity.
    • Brightening tracks: Add a shelving boost above 8 kHz for “air” on vocals.
    • Removing unwanted lows: Employ a high-pass filter below 50 Hz on non-bass instruments.

    Subtractive EQ (cutting frequencies first) is safer than additive EQ (boosting) to preserve natural tone and avoid harshness. Over-EQing can thin out and distort your tracks; adhere to the “less is more” philosophy for maintaining musicality and mix balance.

    Pro tip:
    Sweep a narrow EQ cut (with a high Q value) across the frequency spectrum to pinpoint and reduce problem frequencies. Then, widen the Q and lower the gain to focus your work and minimize phase issues.

    What is Compression? Compression’s Role in Mixing

    Compression controls dynamic range by reducing volume differences between the loudest and quietest moments, making performances tighter, more stable, and professional. It helps tame volume spikes, adds sustain, or locks instruments into a mix. Key compressor settings include:

    • Threshold: Level where compression begins.
    • Ratio: Degree of compression applied above the threshold.
    • Attack: Speed at which compression responds to signals above the threshold.
    • Release: Speed at which it lets go once the signal returns below the threshold.
    • Makeup Gain: Boosts the signal after compression reduces it.

    Common uses include smoothing vocal dynamics, taming snare peaks, controlling boomy bass, and gluing submixes together on buses or the master channel. Over-compression kills life and punch. Aim for transparent control, not squashed tracks.

    Pro tip:
    To avoid over-compression, set the threshold so only peaks are compressed with 2-4dB reduction. Assess the difference with the compressor on and off. If the compressor is more audible than the music, you may be overdoing it.

    EQ vs. Compression: Distinct Roles in Your Mix

    EQ modifies frequencies, while compression adjusts dynamics. If sounds are muddy, harsh, or masked, use EQ. For inconsistencies in volume or lack of punch, apply compression. Here’s a basic guide:

    • Needs EQ if: Tonal issues, clashing instruments, lacks clarity or color.
    • Needs compression if: Volume fluctuations, disappearing instruments, lacks mix stability.

    Most mixers start with subtractive EQ to clean up, followed by compression to control dynamics. For instance:

    • Muddy vocal: Cut 250 Hz with EQ. If still inconsistent, apply compression.
    • Peaky snare drum: Compress to tame spikes. EQ around 400 Hz if it’s boxy.

    Pro tip:
    Solo and listen critically. If the issue persists at all levels, try EQ; if it’s mainly on loud hits or phrases, apply compression. Address tonal issues first for more natural results.

    Which Comes First: EQ or Compression? Understanding Mix Order

    Should EQ precede compression? It depends on context:

    • EQ before compression: Clean the signal first (remove mud, rumble) for predictable compressor behavior—common with vocals and drums.
    • Compression before EQ: If you want to emphasize transients or raise noise levels, let compression impact the raw sound—ideal for creative drum effects.

    Serial chains are popular, for instance: clean up lows with a high-pass filter > compress peaks > shape tone with a second EQ. Effective EQ and compression for vocals often involve removing problem frequencies, then compressing, then adding subtle “air” (high shelf).

    Pro tip:
    Experiment with both sequences. Make two versions of a track—one with EQ before compression and one after. Compare to hear how order affects punch, clarity, and noise. Choose the best sound for your track and style.

    Avoiding Over-Processing: Maintaining Balance in Your Mix

    Over-processing can make audio sound harsh or lifeless, a common mistake for beginners. The solution? Subtlety and context. Check processing in the full mix, not in isolation. Use reference mixes and toggle between processed and unprocessed versions.

    • Start with small EQ cuts/boosts—1 to 3 dB is usually enough.
    • Apply gentle compressor ratios (2:1–4:1 for vocals/instruments).
    • Automate volume for outlier spots, avoiding heavy compression.

    Stop processing if you can’t hear an improvement or if the sound becomes unnatural. Focus on enhancing energy and musicality rather than achieving technical “perfection.”

    Pro tip:
    Every 10-15 minutes, take a break. Listen through different speakers or headphones, or from another room. Fatigue can mask over-processing issues—fresh ears quickly detect mistakes.

    Applying EQ and Compression Together: Real-World Scenarios

    Learn how to effectively use EQ and compression in common mixing situations:

    1. Cleaning a Muddy Vocal

      • Apply a high-pass filter around 80 Hz to remove rumble.
      • Sweep/cut at 200–400 Hz to clear mud.
      • Compress at 3:1 ratio, slow attack (30ms), medium release. Adjust threshold for 3dB reduction.
      • Optional: Add a touch of 12 kHz shelving for “air.”
    2. Tightening Up a Kick Drum

      • Use EQ to cut 300 Hz (boxiness) and boost 60–80 Hz (weight).
      • Compress with a fast attack (5–10ms), medium release, 4:1 ratio for punch.
    3. Smoothing Rhythm Guitar

      • Apply EQ cut at 200–300 Hz if muddy, boost 3–5 kHz for presence.
      • Light compression (2:1 ratio, slow attack) to even out strumming volume.
  • The Complete Guide to Recording Vocals: Studio Techniques for Every Singer

    The Complete Guide to Recording Vocals: Studio Techniques for Every Singer

    The Complete Guide to Recording Vocals: Studio Techniques for Every Singer

    Introduction: The Importance of Quality Vocal Recording

    Creating high-quality vocal recordings is crucial for meeting modern listener expectations and crafting music that truly resonates. Whether you’re an indie artist recording at home or an experienced studio singer, the quality of your recordings greatly influences how listeners connect with your music. Common issues include muffled voices, background noise, and inconsistent tone. Many believe high-end studios are indispensable for great quality; however, effective techniques and knowledge often surpass pure equipment investment.

    This guide provides actionable techniques for vocal recording, balancing technical skills with capturing a captivating performance. We’ll discuss studio setups, microphone selection, vocal processing tips, vocal comping techniques, and effective communication with producers or engineers to enhance your sound. Let’s transform your recordings from amateur to radio-ready step by step.

    Setting Up Your Studio: The Key to Great Vocals

    A well-prepared recording space is crucial for professional-sounding vocals. Acoustic treatment doesn’t have to be costly. The aim is to reduce reflections, prevent standing waves, and minimize reverb. Use DIY solutions like thick duvets, foam panels, or portable isolation shields to improve your sound.

    Eliminate background noise from appliances, fans, and traffic. Turn off unnecessary electronics and consider noise gates. Proper mic placement is essential: position it away from corners and reflective surfaces, and use a pop filter to reduce plosives. Practical elements—good lighting, a comfortable chair, and water—keep you relaxed during long sessions.

    • Use acoustic panels or DIY blankets at reflection points
    • Invest in a microphone stand, pop filter, and isolation shield
    • Close windows/doors and unplug noisy appliances
    • Ensure adequate lighting and an ergonomic workspace

    Pro tip: Perform a “clap test”—clap loudly and listen for echoes. If echoes persist, add more absorption materials to reduce reflections.

    Choosing the Best Microphone and Vocal Chain

    Selecting the right microphone can elevate a vocal take. Dynamic microphones like the Shure SM7B suit aggressive vocals, while large-diaphragm condensers like the Audio-Technica AT4040 are perfect for pop and acoustic sounds. Ribbon mics offer a warm, vintage tone.

    Your vocal chain—microphone, preamp, interface, cables, and headphones—must be reliable. A clean XLR cable and a quality interface prevent noise. Ensure compatibility with your DAW and use setups you understand. A shock mount prevents rumble, and closed-back headphones avoid mic bleed.

    When testing microphones, listen for clarity and the mic’s impact on your voice. Test several before purchasing; it’s not always the most expensive option that suits your needs.

    Pro tip: Rent microphones and record the same passage with each to find the best fit for your voice and genre.

    Vocal Techniques: Achieving Your Best Performance

    A technically perfect recording is incomplete without a dynamic performance. Start with vocal warm-ups like gentle scales and lip trills to protect your voice. Maintain a consistent distance from the mic (usually 6–8 inches), angle it to reduce sibilance, and vary proximity for impact.

    For added fullness, layer key lines and add harmonies. Escape “demo mode” by visualizing a live audience, moving naturally, and focusing on storytelling. Overcome nerves by taking breaks, rehearsing sections, and recording multiple takes.

    Pro tip: Perform three takes in a row without playback to overcome overthinking, revealing an unexpected perfect take.

    Workflow: Comping, Editing, and Processing Essentials

    Comping—the process of combining the best sections of multiple takes—is crucial for a polished performance. In your DAW, stay organized with color-coded takes and clear labels.

    Basic editing involves trimming silences, aligning timing, and minimal pitch correction. Remove background noise with editing tools and start processing with a high-pass EQ, light compression, and a de-esser. Refer to commercial tracks to calibrate your ears, and adjust presets to fit your unique sound.

    Pro tip: Focus on emotion and storytelling during comping. Sometimes, an imperfect line carries more magic than a technically flawless take.

    Communicating with Producers and Engineers Effectively

    Good communication with producers is key to productive vocal sessions. Arrive with a clear vision and use references to illustrate your desired sound. Respect the producer’s workflow by listening fully before giving feedback and being open to suggestions.

    Studio etiquette involves punctuality, prepared parts, and respect for collaborators’ expertise. Miscommunications often stem from unclear time management or creative boundaries, so maintain transparency and respect to yield the best results.

    Pro tip: Spend five minutes at each session’s start clarifying your vision and, at the end, review successes and improvements for future sessions.

    Advanced Vocal Production Techniques for Every Singer

    Experienced vocalists thrive on experimental techniques. Try splitting harmonies, using whispered doubles, or automating effects for impact. Listen for unconventional layer ideas, like octave doubles or non-lyrical sounds, to add uniqueness.

    To manage common issues like sibilance and plosives, use a de-esser, proper mic placement, and dual pop filters. For room tone, increase absorption.

    Balance is vital—pursuing perfection might drain life from your vocals. Trust your ears and embrace slightly flawed but heartfelt takes.

    Pro tip: Experiment with rules, like unusual harmonies or distortion, to carve your unique vocal identity.

    Conclusion & Practical Next Steps: Your Guide to Pro-Level Vocal Recordings

    This guide has covered essential vocal recording techniques—setting up your space, selecting the right gear, managing workflows, and delivering expressive performances. As you apply these recording vocal techniques, follow this pre-session checklist for success:

  • 10 Essential Music Production Tips for Beginners: From Home Studio to Pro Sound

    10 Essential Music Production Tips for Beginners: From Home Studio to Pro Sound

    Blog Post:

    10 Essential Music Production Tips for Beginners: From Home Studio to Pro Sound

    Dreaming of achieving professional sound from your home studio? You’re not alone—many aspiring producers begin exactly where you are. Whether you want to polish your first beat, create full songs, or enhance your recordings, these music production tips for beginners will guide you. We’ll explore essentials to help you navigate gear selection, develop an efficient workflow, sidestep common pitfalls, and expand your creative potential—all without overspending. By the end of this guide, you’ll be equipped to transition from a basic DIY setup to producing high-quality tracks. Let’s dive in!

    Introduction: Start Your Music Production Journey Right

    Embarking on music production or building your first home studio can feel daunting. Perhaps you’ve spent hours on tutorials and researching gear, but your goals remain clear: produce professional-sounding tracks, avoid beginner mistakes, and manage this without a daunting budget or extensive studio experience.

    Common hurdles include gear confusion (What to purchase?), workflow chaos (Why can’t I finish a track?), creative blocks, and feeling limited by your space. Here, you’ll find 10 actionable music production tips, covering affordable equipment, effective workflows, essential mixing basics, and the creative mindset needed. Achieving pro-level sound from home is within reach with the right tools and strategies.

    1. Choosing Your First Home Studio Setup: Essentials to Start

    A common rookie mistake is believing that expensive gear guarantees great results. A streamlined setup with essential equipment is enough to begin creating impressive tracks. So, what should you prioritize?

    • Audio Interface: Connects your instruments/microphone to your computer. Brands like Focusrite (Scarlett range), PreSonus (AudioBox), or Audient (EVO series) are ideal for beginners.
    • Headphones/Monitors: Closed-back headphones such as Audio-Technica ATH-M50x surpass cheap desktop speakers. Upgrade to monitors like KRK Rokit or Yamaha HS as budget permits.
    • DAW (Digital Audio Workstation): The hub for recording and arranging; focus on usability and affordability over brand prestige.
    • MIDI Controller: Basic 25-key keyboards (AKAI MPK Mini, Arturia Minilab) enhance creative possibilities.
    • Basic Microphone: A USB condenser mic (like Audio-Technica AT2020 USB) is a solid starting point for vocals and instruments.

    Pro Tip:
    Maximize your budget by purchasing used gear, starter bundles, or employing DIY room treatment hacks, such as heavy curtains or foam mattress toppers, to optimize sound in your space. Start with essentials and expand as your skills grow.

    2. Understanding Your DAW: The Core of Your Studio

    Your DAW is where music production unfolds: from ideation to mixing and finalizing tracks. Selecting and mastering the right DAW significantly impacts results.

    Beginner-friendly DAWs to consider include Ableton Live (especially Lite), FL Studio, GarageBand (Mac only), Logic Pro X, and Reaper (affordable, functional trial). When choosing, evaluate:

    • Usability: Is the interface user-friendly?
    • Support & Resources: Are there ample tutorials and forums?
    • Budget: Are free trials or affordable versions available?

    Set up DAW templates to streamline songwriting and mixing, and develop good habits like track naming, using shortcuts, and saving multiple project versions to avoid setbacks.

    Pro Tip:
    Test DAW demos for a week—even if you prefer one. The best DAW is engaging and easy for you to use, fostering faster learning and sustained motivation.

    3. Mastering Arrangement: Building Engaging Tracks

    Arrangement transforms raw ideas into finished, listener-friendly tracks. It determines what happens when—shaping your music’s structure and interest.

    Genres share common sections: intro, verse, chorus, bridge, and outro. In pop, it often follows the pattern: intro – verse – chorus – verse – chorus – bridge – chorus – outro. Comparing your work to commercial tracks in your genre helps refine dynamics and pacing.

    Avoid endless looping by sketching a structured outline. Improvement comes from finishing tracks and assessing what succeeds.

    Pro Tip:
    Import your favorite songs into your DAW and use “markers” to map their sections. This hands-on technique quickly teaches effective arrangement, helping to avoid repetitive loops and missing energy builds.

    4. Sound Selection: Crafting Unique Tracks

    Sound selection gives your tracks a unique identity. Beginners typically use virtual instruments (VSTs/soft synths) and samples due to their affordability and flexibility, eliminating the need for hardware synths or drum machines.

    • Access free or affordable sound libraries from sites like Splice, Loopcloud, or Reddit’s r/Drumkits.
    • Go beyond presets—learn to tweak ADSR, filter, and effects settings for custom sounds.
    • Layer similar sounds (e.g., two snares) for richer textures.
    • Keep it simple, buying plugins only when free options lack necessary capabilities, like a must-have synth or reverb.

    Pro Tip:
    Create a “favorites” folder for samples and patches you love. Over time, this builds your personal palette, speeding up workflow and making your sound distinctive.

    5. Recording at Home: Clean, Clear, and Effective

    Home recording maximizes quality with available resources. For vocals or instruments, using a USB condenser mic or basic XLR mic with a reliable audio interface ensures crisp tracks.

    To counter an echo-filled space, employ DIY tactics: hang duvets or blankets behind the mic, place rugs to absorb reflections, and minimize background noise by recording in quiet times.

    • Check input levels—aim for -12 dBFS peaks to avoid distortion (“gain staging”).
    • Use a pop filter for cleaner vocals.
    • Record multiple takes and compile them for the best performance.

    Pro Tip:
    Explore your room with headphones and a mic to find the best sound spots—avoid corners and bare walls for crucial recordings.

    6. Mixing Basics: Achieve Professional Sound

    Mixing transforms ordinary tracks into professional-quality releases. It involves balancing song elements with tools like EQ (clarity), compression (control), reverb (space), and panning (width).

    Compare mixes to admired songs, focusing on volume, instrument placement, and frequency balance using reference tracks.

    • Mix at low volume—sound quality at quiet levels will excel when loud.
    • Test your mix on various systems: headphones, car speakers, phone, and earbuds.
    • Utilize free online courses or YouTube tutorials to improve mixing skills (RecordingRevolution, In The Mix, Pro Audio Files).

    Pro Tip:
    If mixing with headphones, use crossfeed plugins like Sonarworks Reference or Goodhertz CanOpener to mimic monitor speakers and reduce ear fatigue.

    7. Streamlining Workflow: Boost Efficiency and Stay Organized

    A cluttered workspace or disorganized files can disrupt creativity. Treat your music sessions professionally—keep everything organized, from files to project setup, ensuring smooth and productive work sessions.

  • 5 Common Mixing Mistakes Every Producer Should Avoid

    5 Common Mixing Mistakes Every Producer Should Avoid

    5 Common Mixing Mistakes Every Producer Should Avoid

    Introduction: The Importance of Addressing Mixing Mistakes

    Ever wondered why your mixes sound muddy compared to commercial releases? You’re not alone—it’s a common issue among producers. Regardless of whether you’re mixing in a home studio or a professional setting, strong foundational habits are crucial for clear, impactful mixes. Persistent audio mixing errors can make your tracks sound amateurish, irrespective of your equipment. This post highlights the five most critical mixing mistakes to avoid and shares real, studio-tested tips to enhance your music production skills. Every producer encounters these challenges, but learning to identify and resolve them leads to growth and inspiration.

    Mistake #1: Misusing EQ

    EQ is a significant tool in mixing, but misusing it is a common mistake, especially for beginners. Over-boosting, aggressive cutting, or EQing a track in isolation can lead to thin or muddy mixes. For instance, overly cutting a kick drum’s low end or scooping too much midrange from guitars can unbalance your track.

    Start with subtractive EQ—focus on removing problematic frequencies. Use the sweep method to gently cut resonances and always listen in the context of the complete mix. Train your ear to recognize frequency masking, where multiple instruments overlap, and use reference tracks and spectrum analyzers to monitor your balance.

    Pro Tip: Before adjusting EQ, loop a mix section and compare it with a well-mixed reference. Notice how minor EQ adjustments can make elements work together harmoniously.

    Mistake #2: Overusing Compression

    Excessive compression can squash a mix, killing its dynamics and energy. Chasing loudness or blindly using plugin presets can lead to a lifeless sound. Over-compression diminishes the emotional impact of musical peaks.

    Apply compression thoughtfully, allowing parts to breathe. Try parallel compression for consistency without losing excitement. Adjust threshold and ratio carefully, prioritizing musicality over loudness.

    Pro Tip: Compare your compressed and uncompressed versions. If the compressed mix isn’t more controlled or musical, reconsider the compression settings or necessity.

    Mistake #3: Poor Track Balancing

    Perfect EQ and compression are futile if tracks aren’t balanced. Issues like buried vocals or overpowering guitars can ruin a mix’s structure. Proper gain staging and intentional fader settings are key.

    Identify the focal point of your mix first, often vocals or drums, and build around it. Regularly check the balance on various listening systems and use automation for dynamic level adjustments. Reference mixes are invaluable for gauging element interaction.

    Pro Tip: Use volume automation to ensure key sections, like choruses or solos, stand out at the right moments, adding polish and clarity.

    Mistake #4: Ignoring Reference Tracks and Room Acoustics

    Mixing in isolation or a poorly treated room can deceive your ears. Without referencing commercial tracks, your mixes lose perspective. However, ensure your listening environment is accurate—room acoustics or solely using headphones can mislead even seasoned ears.

    Select several well-mixed songs as reference points and use them to check your mix’s bass, vocal placement, and overall volume. Invest in basic acoustic treatment, and cross-check your mix on various headphones and devices to maintain accurate perception.

    Pro Tip: Can’t afford acoustic treatment? Rearrange furniture to minimize reflections and position your monitors in an equilateral triangle at ear level for clearer mixing decisions.

    Mistake #5: Overcomplicating the Mix

    Believing that more plugins equate to a better mix is misleading. Excessive effects and processing can obscure the final output. Often, a minimalistic approach yields the clearest results—mix clarity requires intentionality.

    Use plugins selectively and resist the urge to “fix it in the mix.” Streamline your workflow using templates and focus on creative listening. If you find yourself endlessly tweaking, remove unnecessary effects to regain simplicity and focus.

    Pro Tip: Challenge yourself to use only one or two key plugins per track. Only add extras if they result in a noticeable improvement, keeping your mix disciplined and clear.

    Overcoming Mixing Challenges

    Recognizing these mistakes is a big step forward. Deliberate practice, informed feedback, and focused learning help avoid repeated errors. While initial mixes may falter, treat each project as an opportunity to refine your skills. Establish a feedback loop by bouncing your mix, stepping away, and gathering input from trusted sources.

    Address weak spots by dedicating sessions to specific areas like EQ or compression. Set clear improvement goals and feel free to experiment. For ongoing learning, explore reputable courses, online resources, and community forums where you can exchange insights.

    Pro Tip: Develop a library of reference tracks and “A/B” test every mix adjustment. Over time, your ear will align more closely with professional standards.

    Conclusion: Enhance Your Mixing Skills

    Steering clear of these five common mixing mistakes is the quickest way to achieve professional-sounding results, whether in a home or commercial studio. Concentrating on balanced levels, intentional EQ, thoughtful dynamics, effective referencing, and simplicity will transform your mixes into sharp, impactful productions.

    Implementing small, consistent changes in your workflow can produce notable improvements. What’s your biggest mixing challenge, and how did you overcome it? Share your stories or questions in the comments below. To receive more exclusive mixing tips and resources, sign up for our newsletter—your next breakthrough mix awaits.

  • How to Create Standout DJ Mixes for Social Media in 2024

    How to Create Standout DJ Mixes for Social Media in 2024

    “`html

    How to Create Standout DJ Mixes for Social Media in 2024

    Introduction: Why Standout DJ Mixes Matter on Social Media in 2024

    In 2024, knowing how to create standout DJ mixes for social media is crucial for DJs aiming to enhance their online presence. Social media platforms have become prime locations for discovering new talent. Your mixes serve not only as music but as key tools for DJ mix promotion and personal branding. Many DJs struggle with low engagement, technical challenges, and confusion over effective content strategies. To stand out in this crowded space, your DJ mixes must be high-quality, visually creative, and align with your brand identity.

    This guide will detail actionable steps, introduce the best DJ recording tools 2024, and provide strategies to help your mixes capture attention and grow your following. Expect insights on everything from music selection to mix mastering for Instagram and tips for creating eye-catching DJ mix visual content for TikTok and beyond.

    Social Media Trends for DJs: What to Know in 2024

    Maximizing DJ marketing efforts in 2024 requires understanding current social media trends. Platforms like Instagram Reels, TikTok, YouTube Shorts, SoundCloud, and Mixcloud dominate music sharing. Short-form vertical videos now lead the way as users seek quick, visually stimulating experiences. However, audio-first platforms like SoundCloud remain vital for engaging DJ mixes.

    • Instagram and TikTok prioritize punchy, cinematic video clips that blend visual branding with your music.
    • YouTube Shorts and TikTok reward “loopable” content and engaging starts, so grab attention immediately.
    • Live streaming is increasing, providing real-time connections with fans on Facebook, Instagram, and Twitch.
    • User-generated visuals, such as fans remixing your mix, drive viral growth and audience interaction.

    Pro Tip:
    Spend 30 minutes weekly researching new platform features and trends. Following DJ marketing tips from industry leaders keeps your strategy fresh and effective.

    Crafting Share-Worthy DJ Mixes: Music Selection and Planning

    Creating a share-worthy DJ mix begins with understanding your audience—what genres resonate, which platforms they use, and when they’re most active. By mixing trending tracks with your unique flair, you create an engaging mix that listeners want to share.

    • Mix massive hits, underground gems, and personal favorites for captivating DJ mixes.
    • Short-form platforms perform best with 30–60 second “moments,” while IGTV and Mixcloud support longer, storytelling formats.
    • Observe platform legalities: Avoid full-length, unlicensed tracks to keep your mixes live.
    • Engage directly with your followers for track requests and feedback to boost engagement and tailor future mixes.
    • Explore niche genres or create exclusive remix edits to set your mixes apart.

    Pro Tip:
    Use Spotify playlists and Beatport’s trending charts to track popular tracks and add your twist. Keep a log of what connects with your audience to refine and evolve your mixes.

    Recording High-Quality DJ Mixes: Tools and Techniques

    Achieving high-quality audio is essential for DJ mix promotion. In 2024, top DJ recording tools include all-in-one DJ controllers (Pioneer DJ XDJ, Denon Prime series) and mobile apps like DJay Pro, as well as recorders such as Tascam DR-40X.

    • For professional quality, connect your DJ mixer’s output to an audio interface and record in a DAW (Ableton Live, Logic Pro, Audacity).
    • Monitor your mix in real time and maintain headroom around -6dB to prevent digital clipping.
    • Flawless transitions and balanced EQ are crucial; errors are more noticeable on clean, prerecorded mixes.
    • Edit with gentle compression for punch and apply mastering essentials (EQ, limiting) for consistent platform sound.

    Pro Tip:
    Review your recording on smartphone speakers and headphones. Social listeners often use mobile devices, so aim for clear and compatible audio.

    Enhancing DJ Mixes with Branding and Visuals

    Beyond music, standout DJ mixes require compelling visual branding for shareability. Branded visuals, such as custom logos or animated overlays, increase recognition. With the rise of short-form video, design visuals for vertical screens and rapid engagement.

    • Include your logo and artist name using overlays; tools like Canva and Kapwing offer accessible templates.
    • Use apps like LumaFusion (iOS), VN Video Editor (Android/iOS), or Adobe Premiere Pro for advanced motion graphics.
    • Align visuals—cover art, lighting, effects—with your brand story and mix mood for a consistent identity.
    • Feature audience interactions, behind-the-scenes shots, or lyric snippets to build authenticity.
    • Maintain consistency in fonts, color schemes, and visual elements across platforms.

    Pro Tip:
    Develop a 10-second animated intro or logo sting for all your mixes to visually reinforce your brand and make your content recognizable.

    Platform-Specific Optimization: Formats, Uploads, and Promotion

    Understanding each platform’s preferred formats can boost plays and engagement. Instagram Reels and TikTok recommend vertical videos of 60-90 seconds; YouTube Shorts caps at 60 seconds. SoundCloud and Mixcloud allow full-length, high-res audio.

    • Use concise captions: lead with hooks (“The drop you didn’t know you needed…”) and calls to action (“Tag a friend who’d spin this!”).
    • Research and rotate hashtags weekly for visibility (#OpenFormatMix, #TikTokDJTips, #MixMasteringForInstagram).
    • Post at peak times: weekday afternoons or pre-weekend, when audiences are more receptive.
    • Promote your mix through stories, posts, and “duet/remix” features to boost engagement.
    • Cross-promote: Tease your full mix with clips on Instagram; share SoundCloud uploads in TikTok bios or YouTube descriptions.
    • Host contests, issue duet challenges, and acknowledge your most active fans to generate interaction.

    Pro Tip:
    Create a monthly content calendar featuring new mixes, teaser clips, and engagement-driven posts (polls, Q&As, remix contests) for steady audience growth.

    Evaluating Success and Evolving Your DJ Mix Strategy

    After launching your social media DJ branding strategy, assess the right metrics: mix plays, shares, saves, comments, watch time, and follower growth. Use each platform’s analytics to discern which posts yield the most engagement.

    • On SoundCloud, focus on play counts, likes, and reposts; identify where listeners drop off in mixes.
    • On Instagram/TikTok, analyze retention rates and whether viewers re-watch or share videos.
    • Gather direct feedback from your audience to determine what they want to hear in future mixes.
    • Feature fan remixes to foster community and social proof.
    • Set goals, like a 30% increase in DJ mix plays on SoundCloud over the next quarter.

    Pro Tip:
    Review top- and bottom-performing posts monthly. Identify common factors and adjust your strategy accordingly. Continuous improvement drives successful DJ brands.

    Conclusion: Elevate Your DJ Mixes for Social Media Success in 2024

    Creating standout DJ mixes for social media in 2024 requires more than great music—it’s about mastering content strategies, visually branding your mixes, using top recording tools, and authentically engaging with your fans. Implement these music mix tips and social media optimizations to boost your reach and elevate your online DJ brand swiftly.

    “`

  • Mixing Vocals Like a Pro: Essential Techniques for Artists and Producers

    Mixing Vocals Like a Pro: Essential Techniques for Artists and Producers

    Blog Post:

    Mixing Vocals Like a Pro: Essential Techniques for Artists and Producers

    Mastering Professional Vocal Mixing Techniques

    Mixing vocals like a pro is essential for creating music that captivates listeners and stands out in today’s competitive industry. Whether you’re an artist in your bedroom studio or an emerging producer, vocals are the heart of any contemporary track. They convey emotion, connect with the audience, and are often what listeners remember most. Yet, achieving a professional vocal mix involves overcoming challenges like unwanted noise, clarity issues, and ensuring vocals cut through the mix without sounding harsh or unnatural.

    Artists and producers often face difficulties with vocal mixing, like muddiness or buried vocals. Our guide provides actionable methods for transforming your vocal production, covering everything from editing to polishing with automation and effects. You’ll gain step-by-step mixing tips, advanced techniques for clarity and presence, and a roadmap to achieving a polished sound—even if you’re mixing at home and feeling stuck.

    Prepping Vocals: Editing, Comping, and Cleaning

    Professional vocal mixes begin with meticulous preparation. Start by ensuring the highest recording quality: use a clean signal chain, proper mic techniques, and a well-treated recording space. No plugin can salvage a poorly recorded vocal.

    Select the best performance through comping—combine phrases from multiple takes for a flawless track. Edit vocals by adjusting timing with tools like Flex Time or Elastic Audio and fix pitch issues using Auto-Tune, Melodyne, or your DAW’s pitch corrector. Clean the track by removing background noise, clicks, and pops, and use fades or silence to delete unused regions.

    Pro Tip: Enhance efficiency by naming tracks clearly, color-coding leads, doubles, and harmonies, and organizing vocal stacks with group/bus channels. This organization accelerates your workflow and fosters creativity throughout the session.

    Key Processing Chain: Core Elements of a Pro Vocal Mix

    The foundation of a professional vocal mix is a well-structured signal chain. Typically, vocals are processed by EQing to shape tone and remove problem frequencies, compressing for dynamic control, de-essing to tame sibilance, and finally adding effects like reverb or delay, ensuring optimal gain staging throughout.

    Begin with a gentle high-pass filter to eliminate rumble, followed by compression with a 3:1 ratio, 20–40 ms attack, and 50–100 ms release for smooth control. Post-compression, use a de-esser to manage sibilance. Place time-based effects on send/return tracks for flexible mixing.

    Parallel processing blends processed and clean signals for depth and power. Mind the levels at each stage to prevent clipping or detail loss.

    Pro Tip: Try serial vs. parallel compression. For thicker vocals, use a light compressor before the main processor, or duplicate and heavily compress a track to mix subtly with the main vocal.

    EQ Techniques: Enhancing Clarity and Tone

    EQ adjustments are crucial for enhancing vocal clarity and fitting the performance seamlessly into your mix. Use subtractive EQ to remove muddy frequencies before boosting desired areas with additive EQ.

    Cut low-mid mud (150–350 Hz), nasal tones (800–1200 Hz), and harshness (2.5–4 kHz). Use a high-pass filter below 80 Hz to remove noise, and a gentle high shelf boost above 8–10 kHz for airiness if required.

    Adjust based on vocal type and genre: male voices may need more low-mid control, while female voices benefit from upper-mid clarity boosts. Pop and EDM genres often require more top-end sparkle, whereas classic rock may prefer a warmer tone.

    Pro Tip: Use a narrow Q and boost while soloing to identify resonant areas, then subtly cut those zones for cleanliness.

    Compression: Managing Dynamics and Enhancing Presence

    Vocals fluctuate naturally, complicating consistency in dense mixes. Compression ensures even dynamics, so every word stands out without peaking.

    Begin with a 2:1 to 3:1 ratio, fast attack (20–40 ms), and medium release (40–80 ms) for basic leveling. Apply serial or parallel compression if needed for thickness without dullness.

    Avoid over-compression (6 dB+ gain reduction), which sounds unnatural and diminishes emotional impact. Aim for transparent control that enhances presence.

    Pro Tip: For aggressive genres like hip-hop or EDM, use an 1176-style compressor with fast settings to bring vocals forward, followed by an LA-2A for musical smoothness.

    De-Essing: Controlling Harsh Sibilance

    Sibilance, the harsh “S,” “T,” and “SH” sounds, can pierce after compression and EQ. Tackling this is vital for vocal clarity.

    Apply a de-esser after compression, targeting frequencies (4–9 kHz) to only attenuate the harshest sounds. Split-band mode impacts only problem frequencies, offering transparency.

    For stubborn sibilance, automate or use clip gain to manually reduce specific sounds, avoiding overall dullness.

    Pro Tip: Use the “listen” mode on your de-esser to ensure precise sibilance reduction without affecting vocal brightness.

    Creating Vocal Space: Reverb and Delay Techniques

    Dry vocals can feel disjointed. Smart use of reverb, delay, and stereo effects adds dimension and natural placement in the mix.

    Use a plate or chamber reverb with a short decay and pre-delay of 20–30 ms to sustain upfront vocals. Utilize slapback or quarter-note delay to add width. Place these effects on auxiliary tracks for blending and automation.

    Use effects sparingly to prevent muddiness. High-pass your reverb return (160–250 Hz) for clarity. Automate effects for expressive transitions between verses and choruses.

    Pro Tip: Subtly apply stereo widening or pitch-shifted chorus on reverb/delay sends for greater separation, perfect for pop or electronic styles.

    Automation and Final Enhancements

    Static vocal levels often lack the natural feel throughout a track. Automation in volume, EQ, and effects maintains performance energy, focusing and engaging listeners.

    Adjust volume for balance, increase effects for dynamic choruses, and decrease during verses for intimacy. Some mixers enhance choruses with a gentle high-end EQ boost for extra shine.

    Before finalizing, compare your track with professional releases of similar loudness. Verify clarity across multiple playback systems. If necessary, add mild multi-band compression or saturation for a polished mix—without overdoing it.

    Pro Tip: A seamless vocal mix creates a lasting impact. Embrace continuous refinement and exercise critical listening to reach professional vocal mixing prowess.

  • The Ultimate Beginner’s Guide to Home Music Production

    The Ultimate Beginner’s Guide to Home Music Production

    The Ultimate Beginner’s Guide to Home Music Production

    Introduction: Why Home Music Production is Popular Now

    Over the last decade, home music production has surged in popularity, offering aspiring musicians and producers a chance to create professional-sounding music without the need for an expensive studio. With essential tools and the right knowledge, producing music at home is more feasible than ever. Whether you’re aiming to cut down on studio costs, enjoy creative autonomy, or work at your own pace, the advantages of a home production setup are clear.

    Despite its accessibility, many beginners find the idea of starting with music production basics daunting due to perceptions of it being overly technical or expensive. This guide aims to simplify the process, outlining the essential equipment and offering practical music production tips for beginners. If you’re starting from scratch and eager to learn how to create music at home, this guide will help you understand what you need, how to set up your studio, select top music production software for beginners, and confidently begin composing your own tracks.

    Setting Up Your Home Studio: Gear Essentials and Space Optimization

    Selecting the right location is the first step in becoming a bedroom producer. Opt for a quiet, comfortable, distraction-free area away from noisy streets and communal spaces. While perfect acoustics are beneficial, don’t let the lack of it be a barrier; a modest, well-organized space can produce professional results with an efficient home studio workflow.

    For beginners, the basic home studio setup should include:

    • A computer (Mac or PC, laptop or desktop)
    • Closed-back headphones for accurate immersion
    • An audio interface to connect your gear to the computer
    • A digital audio workstation (DAW) software

    Microphones, MIDI keyboards, and studio monitors are useful but not essential for starting out. Consider investing in used gear and prioritize high-quality headphones and an audio interface. Basic acoustic treatment like foam panels or bookshelves can significantly improve sound quality.

    Ergonomics are important: arrange your desk, chair, and monitor to allow for comfortable, extended work sessions. Good lighting and tidy cable management can enhance productivity and creativity.

    Pro Tip:

    Begin with what you have and upgrade gradually as your skills improve. Prioritizing workflow and comfort over expensive gear helps you learn faster and avoid unnecessary expenses.

    Choosing the Best DAW for Beginners

    The digital audio workstation (DAW) is the core of any home music production system. It is the software you’ll use to create, record, edit, mix, and master your songs. Selecting a DAW can be overwhelming due to numerous options, but many offer trial versions and affordable entry points.

    Top beginner-friendly DAWs include:

    • GarageBand (Mac, free, user-friendly)
    • FL Studio (Windows/Mac, popular with beatmakers)
    • Ableton Live Intro (great for electronic and performance producers)
    • Logic Pro X (Mac, advanced features)
    • Reaper (affordable and customizable)

    Free DAWs are excellent for getting started, though paid versions often offer more features and better support. Align your choice with your goals: Do you want a variety of instrument sounds? Do you value an intuitive workflow? Evaluate the interface of each DAW to find the one that feels natural to you.

    Learn the key functions like track creation, audio recording, MIDI sequencing, and plugin loading. This foundation prepares you for advanced production techniques.

    Pro Tip:

    Avoid frequently switching between DAWs—commit to one for several months. Focusing on a single platform helps develop muscle memory, refine your workflow, and increase your music output.

    Core Components: Audio Interface, MIDI Controller, and Accessories

    An audio interface is the central piece that connects your microphone, instruments, and monitors to your computer, ensuring high-quality sound with minimal latency. Entry-level music production gear bundles often include interfaces from trusted brands like Focusrite Scarlett or Presonus AudioBox.

    A MIDI keyboard offers hands-on control over software instruments, easing the process of crafting melodies and beats. While not compulsory, an affordable 25-key or 49-key MIDI controller enhances creativity during music production.

    Basic USB microphones suffice for demo vocals, but an XLR condenser mic is ideal for professional vocal and acoustic recordings—ensure your audio interface supports XLR inputs. High-quality headphones are key for privacy and accuracy, making closed-back models a wise choice. Although studio monitors enhance mixing, prioritize other components if budget is an issue.

    You’ll need standard cables (USB, TRS, XLR) for connections. Maintain a checklist, and organize cables to ensure quick setups with minimal clutter.

    Pro Tip:

    Initially, invest in quality headphones and a decent audio interface. These components significantly enhance your ability to discern audio details and secure clear recordings, crucial during the learning phase.

    Music Production Workflow: A Beginner’s Step-by-Step Guide

    Every track begins with inspiration. The typical music production process includes these stages:

    1. Composing: Start with a melody, chords, or beat that ignite your creativity.
    2. Recording: Capture instruments or vocals using your MIDI keyboard if live instruments aren’t available.
    3. Editing: Refine parts with your DAW’s tools—quantize MIDI, edit audio, adjust sections.
    4. Mixing: Balance elements with EQ, compression, and effects to create space and clarity.
    5. Mastering: Apply subtle enhancements to polish your mix and prepare it for distribution.

    Regularly save your projects and experiment with various plugins. Once you’re ready to share your music, export your tracks to formats like MP3 or WAV for platforms such as SoundCloud, YouTube, or via distribution services like DistroKid.

    Pro Tip:

    Work in focused, short sessions aiming to complete simple tracks quickly rather than seeking perfection. This strategy accelerates learning and helps beginners develop a comprehensive, repeatable workflow.

    Dealing with Common Challenges and Avoiding Pitfalls

    Feeling overwhelmed by the multitude of tutorials, opinions, and gear suggestions is common. Progress is achieved through hands-on learning rather than endless research; select a couple of reliable resources and follow their step-by-step music production guide.

    Decision fatigue regarding equipment or software is typical. Every professional started somewhere—choose the DAW or microphone you understand best. Don’t expect perfection from your first tracks; they’re stepping stones toward learning.

    Technical glitches like latency, distorted audio, or computer malfunctions are normal. Most issues have resolutions—utilize user forums, reference gear manuals, or watch troubleshooting tutorials.

    Stay motivated by tracking your progress and setting realistic goals for each session. Avoid comparing yourself to others; instead, celebrate each completed track as part of your journey.

    Pro Tip:

    Maintain a production journal. Document successful strategies, challenges, and lessons from each session. Reviewing your entries over time will highlight growth and keep the focus on improvement.

    Further Resources, Communities, and Steps Forward

    Learning music production becomes easier and more enjoyable when you engage with the right resources and communities. Explore free YouTube tutorials from producers such as Andrew Huang, In The Mix, or Rachel K Collier, or enroll in online courses from Berklee Online, Udemy, or Coursera for structured learning.

    Join forums like Gearspace or Reddit’s r/WeAreTheMusicMakers for feedback and collaboration. Books like “Mixing Secrets for the Small Studio” or podcasts like “Tape Op Podcast” provide valuable insights, while online magazines such as Sound On Sound offer updates on industry trends.

    Set straightforward objectives: “Finish one song a month” or “Try a new technique each session.” Taking these steps will solidify your foundation in home music production.

  • Mastering Essentials: How to Polish Your Music for Streaming Platforms

    Mastering Essentials: How to Polish Your Music for Streaming Platforms

    Mastering Essentials: How to Polish Your Music for Streaming Platforms

    Introduction: The Importance of Mastering for Streaming Platforms

    Mastering is the crucial final step in preparing music for streaming platforms, transforming a well-mixed track into a professional, release-ready product. Streaming platforms like Spotify, Apple Music, and YouTube impose specific technical requirements and loudness standards that every artist must understand. A professionally mastered track delivers clarity, consistent loudness, and a polished sound that translates across all playback systems. For many independent musicians, understanding audio mastering tips, streaming platform loudness standards, and technical specifications can be challenging—especially with tight budgets and limited experience.

    In this article, we’ll simplify the process of mastering music for Spotify and Apple Music, explore platform standards like LUFS targets, and offer actionable steps for indie artists. Whether you’re a novice seeking mastering tips or aiming to achieve high sound quality for streaming, this guide provides the essentials needed for confident music release preparation.

    Decoding Streaming Platforms’ Technical Standards

    Streaming platforms use loudness normalization to ensure consistent playback volumes for listeners. Your music must meet specific loudness standards; otherwise, it could be turned down or lose impact. Key specifications include:

    • Spotify: -14 LUFS Integrated, True Peak below -1 dBTP
    • Apple Music: Around -16 LUFS, True Peak below -1 dBTP
    • YouTube: -14 LUFS, with unique normalization processes
    • Sample Rate & Bit Depth: 44.1kHz/24-bit or 16-bit WAV for upload

    Failing to meet these LUFS targets may result in distortion or significant volume drops, harming the listener experience. Always supply high-quality WAV or FLAC files, avoiding MP3s unless explicitly requested, as they can degrade sound quality. Remember: louder isn’t always better; overly compressed masters may suffer post-normalization.

    Pro tip: Always review platform-specific mastering guides—both Spotify and Apple Music offer official recommendations—to perfect your track quality for streaming.

    Pre-Mastering Steps: Getting Your Mix Ready

    A great master starts with a clean, balanced mix. Before mastering music for streaming, ensure your mix is free from frequency clashes, well-leveled, and that all components are clearly audible. Decide between solo (single stereo file) or stem mastering—stem mastering offers more control over elements like vocals and drums but may require more resources.

    Leave sufficient headroom: export your mix with peaks near -6 dBFS and maintain at least 24-bit depth with dither enabled when necessary. Regularly check for phase issues, ensure bass frequencies aren’t muddy, and compare your mix to professional reference tracks. This fine-tuning greatly impacts the mastering stage.

    Pro tip: Use a LUFS meter when A/Bing with reference tracks to match perceived loudness, enabling an unbiased assessment of your mix before mastering.

    Essential Mastering Techniques for Streaming Success

    A typical mastering chain for streaming includes:

    1. EQ: Correct frequency imbalances gently.
    2. Compression: Control peaks and enhance mix consistency.
    3. Limiter: Raise levels to LUFS targets, avoiding true peaks.
    4. Stereo Imaging: Adjust width; keep bass mono below 120 Hz to avoid artifacts.

    Use metering plugins to monitor LUFS, true peak, and dynamic range. Choose transparent mastering plugins, such as iZotope Ozone or TDR Limiter. Preserve transients and dynamics: excessive limiting can harm clarity, especially post-normalization. Periodically check mono compatibility by collapsing your master.

    Pro tip: Many platforms apply their own codecs—use plugin emulations like Sonnox Codec Toolbox to preview your master’s sound after streaming compression.

    Recommended Tools and Software

    Professional results don’t require costly equipment. Affordable and free plugins for mastering music for Spotify and Apple Music include:

    • TDR Nova (dynamic EQ)
    • Limiter No6 (transparent limiter)
    • SPAN by Voxengo (spectrum analyzer)
    • Youlean Loudness Meter (accurate LUFS/true peak readings)

    DAWs like Ableton Live, Logic Pro X, and FL Studio offer powerful mastering tools. Online mastering services (such as LANDR or eMastered) give quick results—ideal for demos—but always compare them to manual mastering for best quality.

    Backup each version of your master, label files with version numbers, and regularly A/B against rough mixes and references to avoid mix fatigue and track progress.

    Pro tip: Create a “mastering template” with preferred plugins, checklists, and reference tracks to streamline your process and ensure project consistency.

    Uploading and Quality Control: Delivering Your Music

    Before releasing, listen to your master across multiple systems—phones, earbuds, car stereos, and monitors. Scan for artifacts, clicks, or distortion and double-check for clipping. Export as a 44.1kHz, 24-bit or 16-bit WAV for best distribution quality.

    Distributors like DistroKid, CD Baby, or Tunecore handle conversion and delivery, but ensure your metadata is correct: artist name, track title, ISRC code, and naming conventions. If aggregators flag issues, consult troubleshooting guides—often, adjusting true peak and avoiding over-compression fixes problems.

    Pro tip: Use a final pre-delivery checklist: (1) Listen end-to-end, (2) Confirm file settings, (3) Check metadata, (4) Confirm version, (5) Back up everything—this prevents last-minute issues and failed uploads.

    FAQs: Overcoming Mastering Challenges

    Should I master louder for streaming? No—follow platform guidelines; excessive loudness can lead to your track being turned down and sounding worse on platforms like Spotify.

    Is DIY mastering sufficient? Often yes, if you use proper tools and reference professional tracks. Seek feedback from trusted sources or hire a professional if uncertain.

    Why does my master sound different on Spotify? Streaming codecs and normalization alter playback. Preview using tools and always listen post-release to compare platform performance.

    To avoid over-analyzing, set clear deadlines and remember—done is better than perfect. Stay updated on distribution requirements; standards evolve. Your track is ready when it translates across all systems, meets specs, and holds up against professional tracks.

    Pro tip: Engage in music production forums and subreddits; community feedback can quickly identify issues overlooked after hours in the studio.

    Conclusion

    Mastering for streaming platforms is more achievable than ever, thanks to an abundance of tools and clear guidelines for indie artists. By understanding platform loudness standards, establishing a robust mastering chain, prioritizing music release preparation, and maintaining meticulous quality control, you’ll consistently produce professionally polished tracks. Let go of fear or technical confusion—embrace the process, experiment with different techniques, and let your music shine across every streaming platform.

  • The Ultimate DJ Mix Promotion Strategy: Get Your Mixes Heard Online

    The Ultimate DJ Mix Promotion Strategy: Get Your Mixes Heard Online

    The Ultimate DJ Mix Promotion Strategy: Get Your Mixes Heard Online

    Introduction: Why Effective DJ Mix Promotion Matters

    In today’s overwhelming digital music scene, making your DJ mixes stand out is crucial. Even the most skilled DJs struggle for recognition without strategic DJ mix promotion. Whether you’re new to the scene or have some traction, a well-planned strategy is essential to boost DJ mix plays and forge meaningful connections in 2024 and beyond. This guide will equip you with a step-by-step plan to promote your DJ mixes online. You’ll discover impactful DJ branding techniques and actionable online DJ marketing strategies. Dive into proven music promotion tips, explore top mix-sharing platforms, and learn insider methods to heighten audience engagement, ultimately crafting a practical plan to get your mixes heard.

    Common DJ Mix Promotion Mistakes to Avoid

    Understanding why DJs often struggle with mix promotion is crucial for your success. Mistakes like irregular uploads without a consistent schedule can lose listeners’ attention. Relying solely on one platform, like SoundCloud or Mixcloud, limits your reach and opportunities for music discovery. A weak brand identity results in forgettable mixes, while neglecting details like compelling visuals, detailed tracklists, and optimized metadata hurts discoverability. Many DJs fail to use industry contacts or collaborate for cross-promotion, and neglect audience engagement. Ignoring analytics and listener feedback can lead to missed growth opportunities.

    Pro tip: Plan every release meticulously. Prepare artwork, tracklisting, and actively engage your network before and after release to build early momentum.

    Step 1: Establishing a Strong DJ Brand

    Your DJ brand is your identity—it’s what makes you memorable. Begin by defining your distinct musical identity: Which genres do you represent? What experience do you want to provide listeners? Create a brand kit with cohesive visuals, like curated cover art and a distinctive logo, ensuring consistent visuals across mix-sharing platforms and social channels. Write a captivating DJ bio that clearly outlines your style, inspirations, and accomplishments. Optimize your online presence with a central portfolio, using a modern website, Linktree, or EPK, to make it easy for fans, promoters, and collaborators to find you. Narrate the story behind each mix, highlighting special tracks or transitions for a deeper audience connection.

    Pro Tip: Enrich every mix you post with a story. Include notes on track selections, the recording mood, and shout-outs to artists or labels, transforming passive listeners into genuine fans.

    Step 2: Choosing and Optimizing Mix Sharing Platforms

    Choosing the right platforms for sharing your DJ mixes is crucial for maximizing reach. Platforms like SoundCloud, Mixcloud, YouTube, Audiomack, Apple Podcasts, and Spotify each offer distinct advantages. SoundCloud excels in DJ promotion with its repost features and active communities; Mixcloud is ideal for long-form sets with legal track reporting. YouTube allows global exposure through visually engaging videos or live DJ sets. Optimize every upload with keyword-rich titles, captivating descriptions, and precise genre/artist tags. An appealing cover art and comprehensive tracklisting, combined with platform features like playlists or reposts, will enhance discoverability and increase your DJ mix plays. Encourage subscriptions and include clear calls-to-action.

    Pro Tip: Post teasers or transitions as clips on different platforms, and cross-link the full mix. Expand your reach beyond a single platform to engage diverse audiences.

    Step 3: Engaging Social Media and Creating Content

    Ignoring social media is not an option for effective DJ promotion. Instagram is perfect for visuals and stories, while TikTok and Reels excel in viral music discovery. Facebook and X/Twitter still play a role in sharing mixes with groups or industry professionals, and Threads can attract new music fans. Produce engaging behind-the-scenes content, live previews, or mix teasers to boost excitement. Use stories and Q&As to make your process relatable. Cross-promote by directing Instagram followers to Mixcloud, SoundCloud fans to your newsletter, or TikTok viewers to your YouTube channel. Captivating captions, strategic hashtags, and collaboration tags expand organic reach.

    Pro Tip: Allocate 30 minutes post-upload to respond to comments and DMs—these initial interactions can cultivate lifelong fans. Collaborate with fellow DJs for cross-promotion.

    Step 4: Growing and Engaging Your Fanbase

    Transform your approach from seeking plays to cultivating loyal fans. Start a mailing list or newsletter to inform listeners about new mixes, gigs, or branding tips. Offer exclusives like early access, free downloads, or personalized shout-outs to foster engagement and community. Respond sincerely to comments and express gratitude for feedback. Host mix premieres, conduct live Q&As, or feature fan testimonials to strengthen connections. Implement interactive strategies like future mix theme polls or user-generated content contests.

    Pro Tip: Use a simple Google Form or social media poll to let fans vote on themes, track selections, or genres, giving them a role in your creative process and appreciating their input.

    Step 5: Analyzing Data for Continuous Improvement

    Analytics are a crucial asset for refining DJ mix marketing. Review play counts, downloads, shares, and demographics to discover what resonates. Analyze platform performances—are your deep house mixes more popular on SoundCloud than YouTube? Use feedback from comments and messages to refine your style and approach. Experiment with different mix lengths, posting schedules, or content ideas. Stay informed on platform trends and algorithm changes. Set realistic goals, like 10% more plays monthly or doubling mailing list signups, and celebrate achievements as motivation.

    Pro Tip: Maintain a straightforward spreadsheet to track mix performance across platforms. Regular reviews will help you double down on successful formats and explore new ideas for underperforming mixes. Let audience data drive your evolution.

    Conclusion & Action Plan: Elevate Your DJ Mix Promotion

    Our multi-faceted strategy is your key to getting DJ mixes heard—establish a compelling brand, select and optimize sharing platforms, produce engaging content, nurture your fanbase, and scrutinize data for ongoing growth. Effective promotion is as experimental and patient as it is driven by effort. Set your next step—choose your platform, refresh your bio or artwork, or plan your next release with a solid DJ social media strategy. Start your journey to higher DJ mix plays and richer music discovery today.

    Ready to elevate your DJ career? Subscribe for additional music promotion tips, download our free DJ mix promotion checklist, or share your latest mix link in the comments! Join our community and transform your passion into a movement.